When it comes to dash cameras, VIOFO is one of the renowned brands that produce quality dash cams with the latest technology. If you own a VIOFO dash camera, you should know that VIOFO regularly releases firmware updates for all its dash cam models. These firmware or software updates are released to remove any bugs present in the existing firmware and to make improvements.
So, if you haven’t updated the firmware of your dash cam since your purchase or don’t know the proper method to do so, we have explained the necessary steps to update your VIOFO dash camera firmware.
Update VIOFO Dash Cam Firmware
To perform the VIOFO firmware update, follow these steps:
First, download the firmware update files from the VIOFO website. Visit the official website at https://viofo.com/
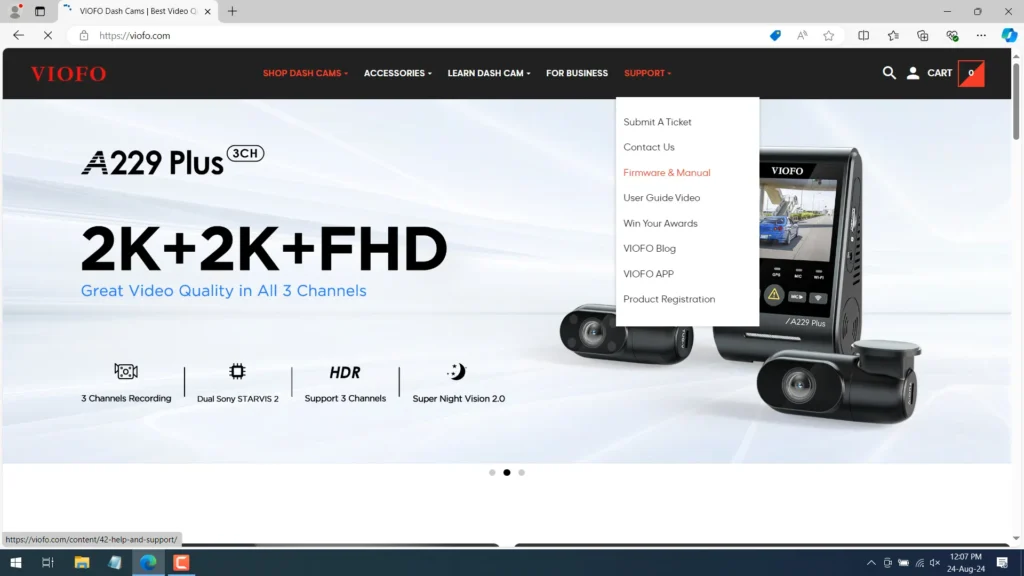
From the homepage, click on the “Support” tab and select “Firmware and Manual.” This will take you to the Help and Support page.
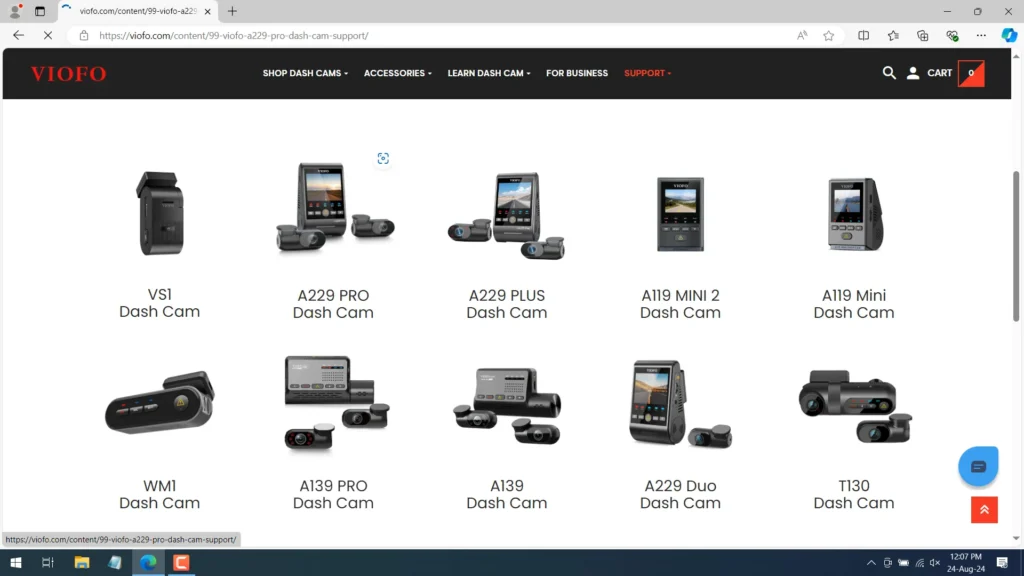
Scroll down to find all the dash cam models by VIOFO listed. Click on the model of your dash cam, which will take you to its specific page.
Scroll down to the firmware section. Here, you will find the latest firmware update files with version details.
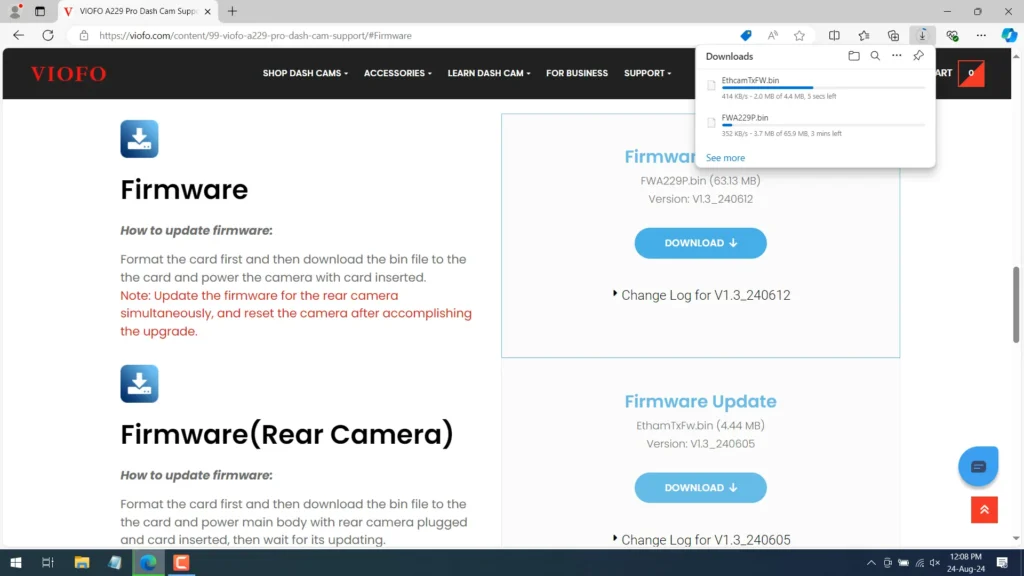
Download the appropriate firmware update files. If you have a single-channel dash cam, there will be only one file. If you have a dual-channel or three-channel dash cam, there may be two firmware files to download.
Once the files have been successfully downloaded, you can proceed to the next steps.
Insert the Micro SD card into your laptop or PC, and format it to FAT32 or exFAT.

After formatting, paste the downloaded firmware files into the Micro SD card.
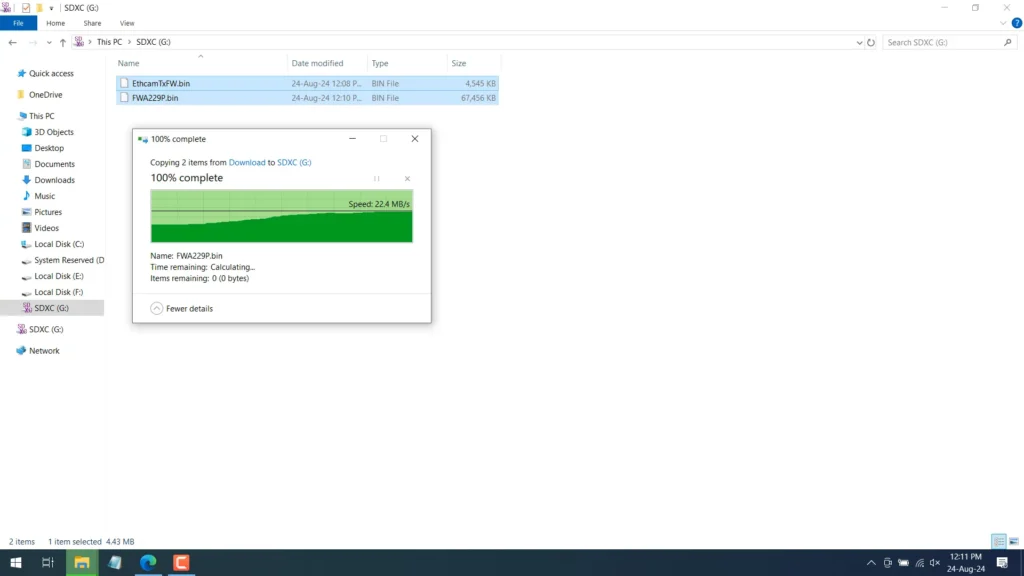
Insert the SD card into the dash cam’s slot. Before plugging in the SD card, ensure the dash cam is turned off. If you have a dual or three-channel dash cam, make sure all the cameras are attached to the main dash cam unit.
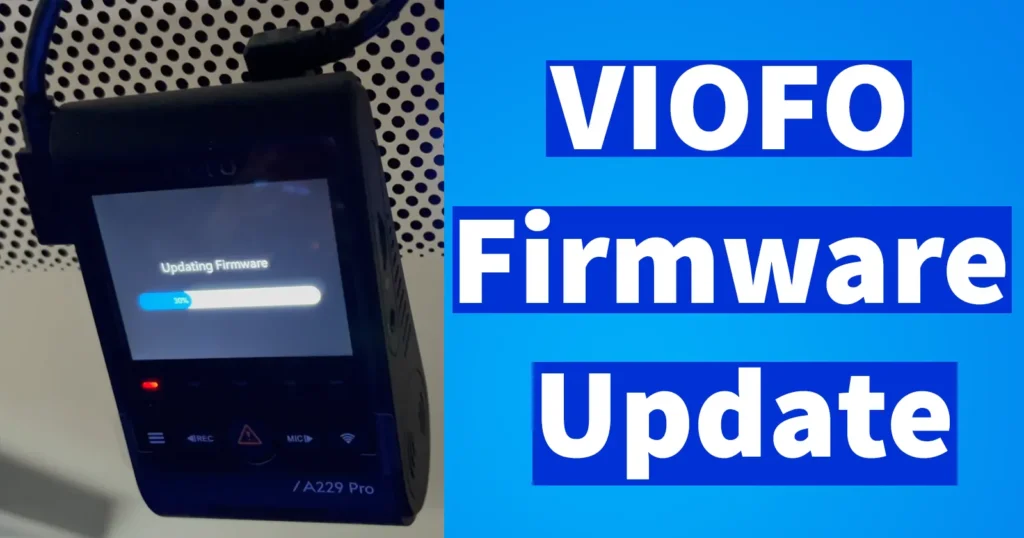
Turn on the dash cam after inserting the SD card. Upon booting up, the dash cam will start updating the firmware from the SD card. A message will display on the screen: “Updating Firmware,” along with a status bar.
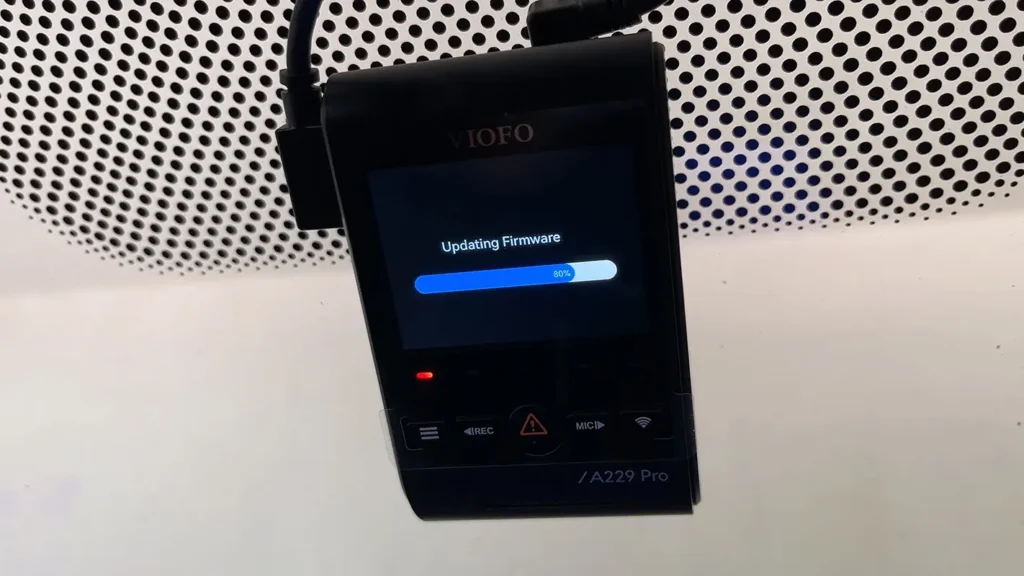
The update process may take a few minutes to complete. During this time, avoid interfering with the dash cam or turning it off.
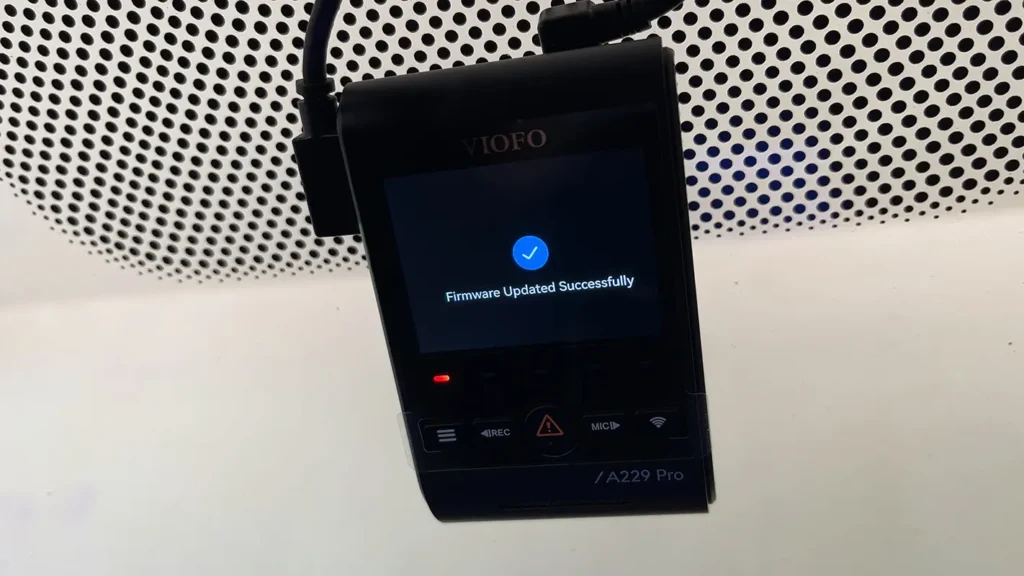
Once the firmware update is complete, a message will appear: Firmware Updated Successfully. The dash camera will then restart.
Once the dash cam boots up, within a few seconds, you will see a message: Sending Firmware to Rear Cam.
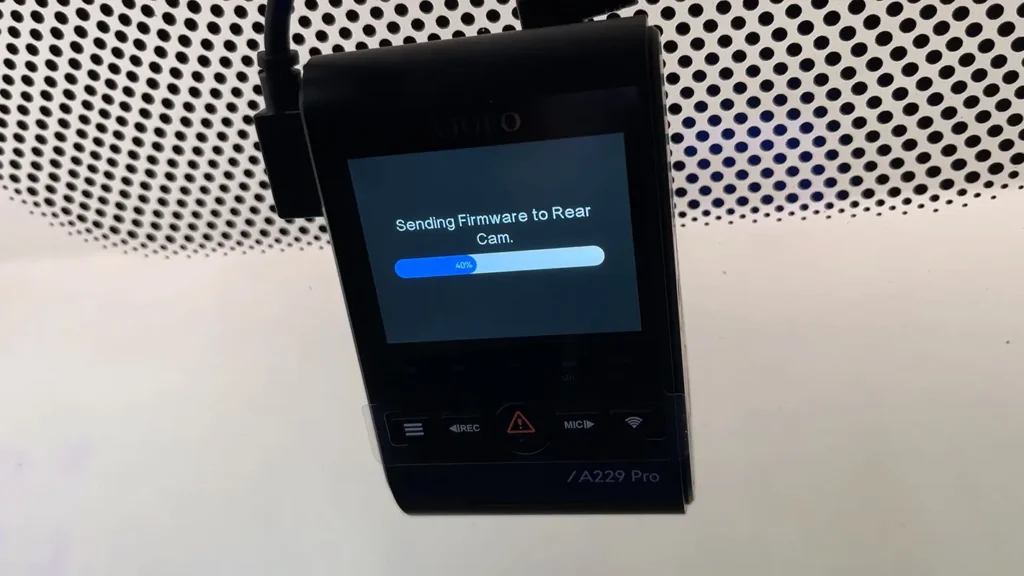
This means the firmware is being sent to the rear camera for an update.
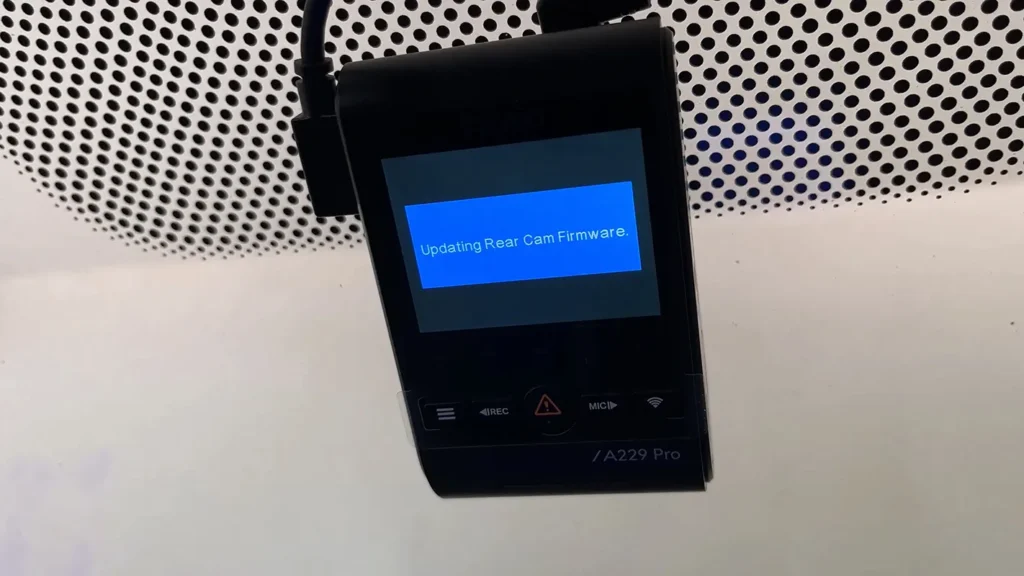
Once the Sending Firmware to Rear Cam status reaches 100 percent, a message will be displayed: Updating Rear Cam Firmware. This process may take a few minutes to complete.
Once the rear camera firmware is successfully updated, your dash camera will restart.
On updating the firmware it is advisable to reset the dash cam as recommended by VIOFO
To reset the dash cam to factory default settings, first stop the recording by pressing the REC button on dash cam
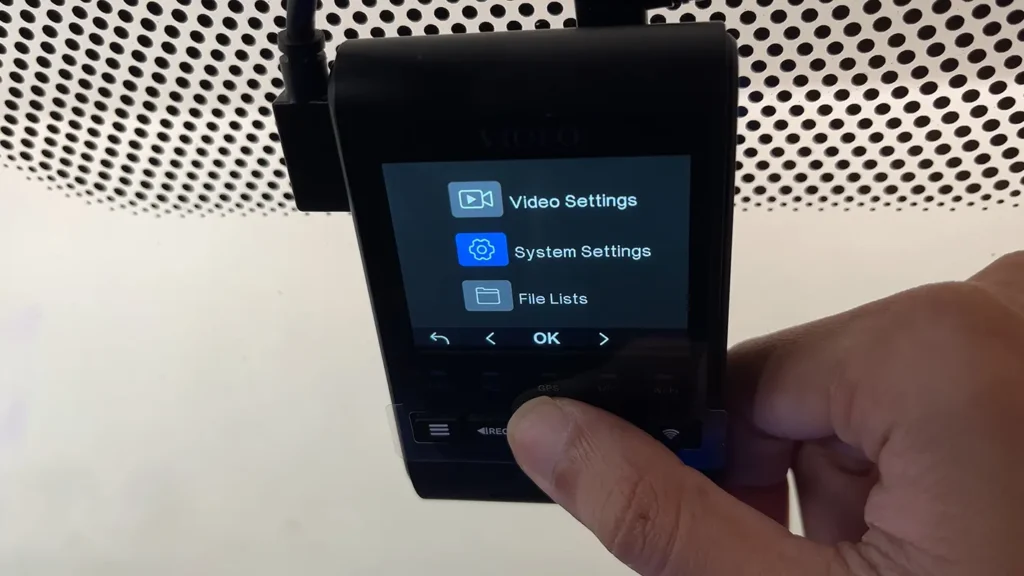
Then enter the settings by pressing the Hamburger button on dash cam
This will load the Settings page, Scroll down to System Settings (you can scroll up using the REC button and scroll down by pressing the MIC button, if need to go back then press the hamburger button)
Once bringing the selection to System Settings press OK by pressing the button exclamation on the dash cam
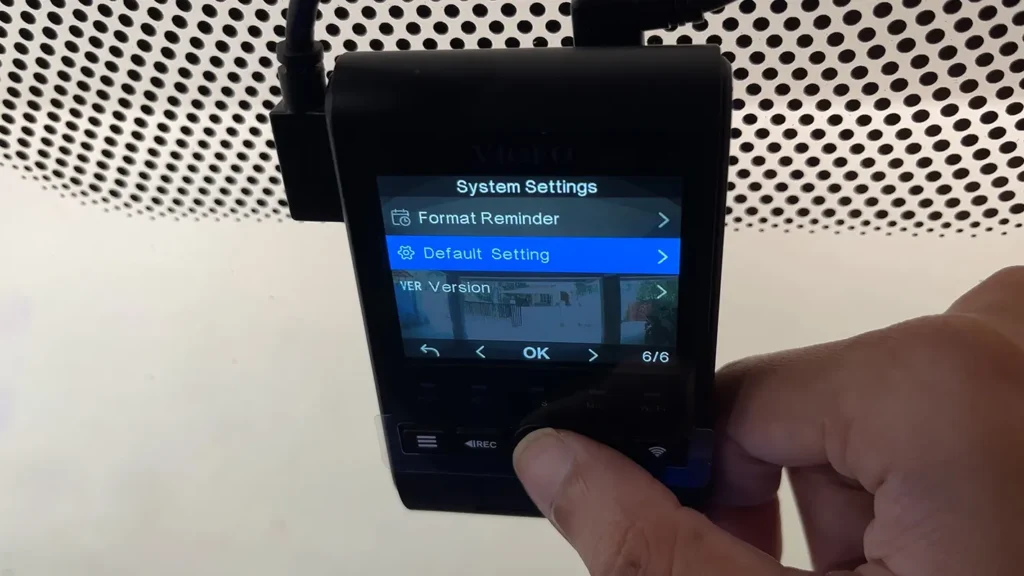
From the System Settings scroll down until you get Default Setting option and click on OK
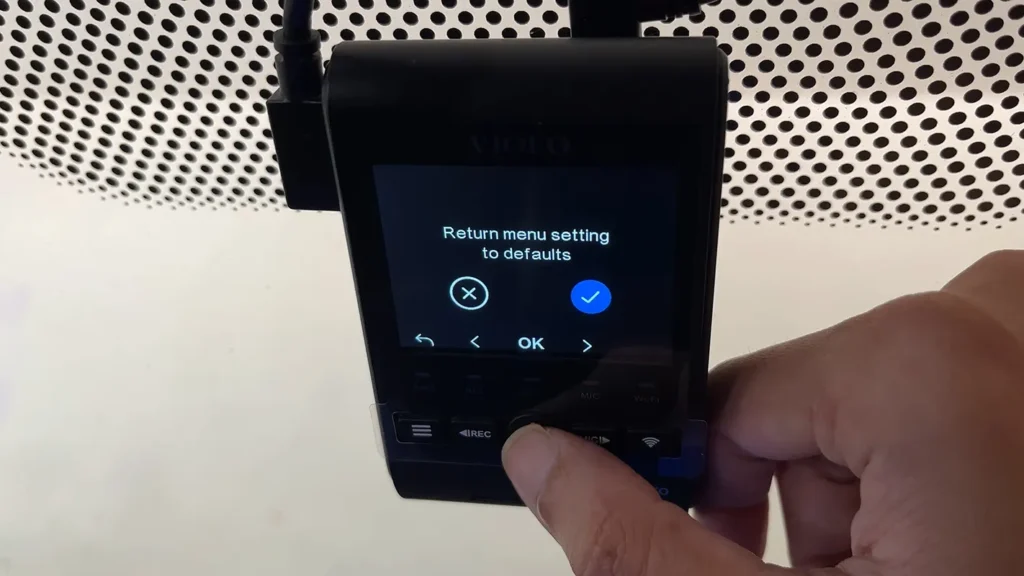
It will bring an prompt Return menu settings to defaults, bring the selection on OK button by pressing the MIC button and press OK to proceed resetting
Your dash cam will reset and it will be reboot
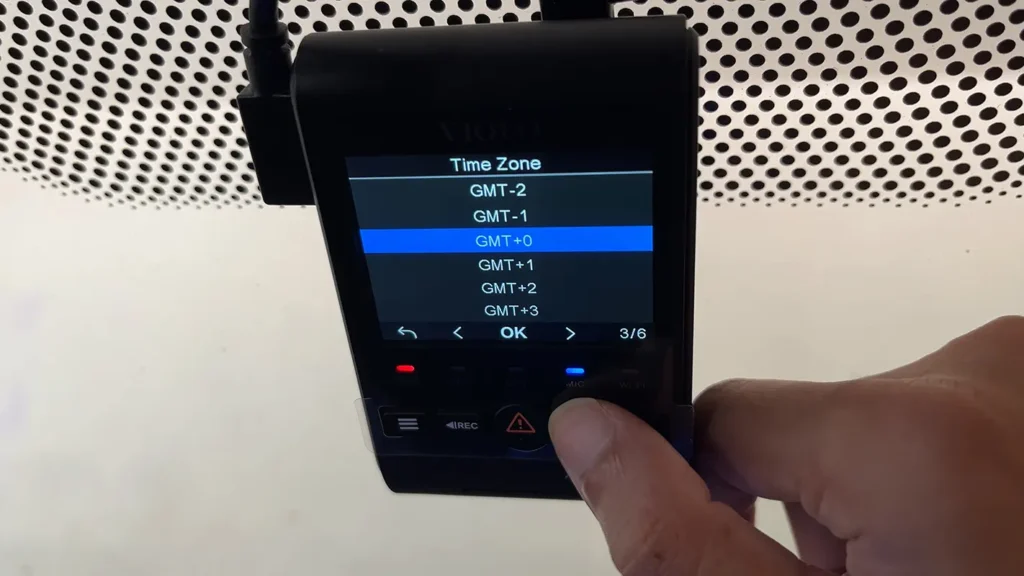
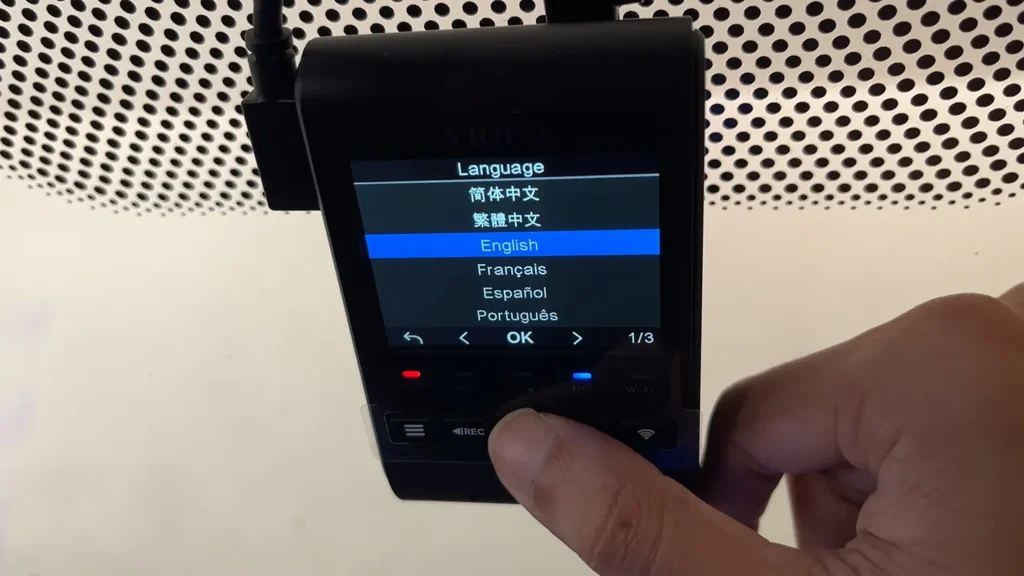
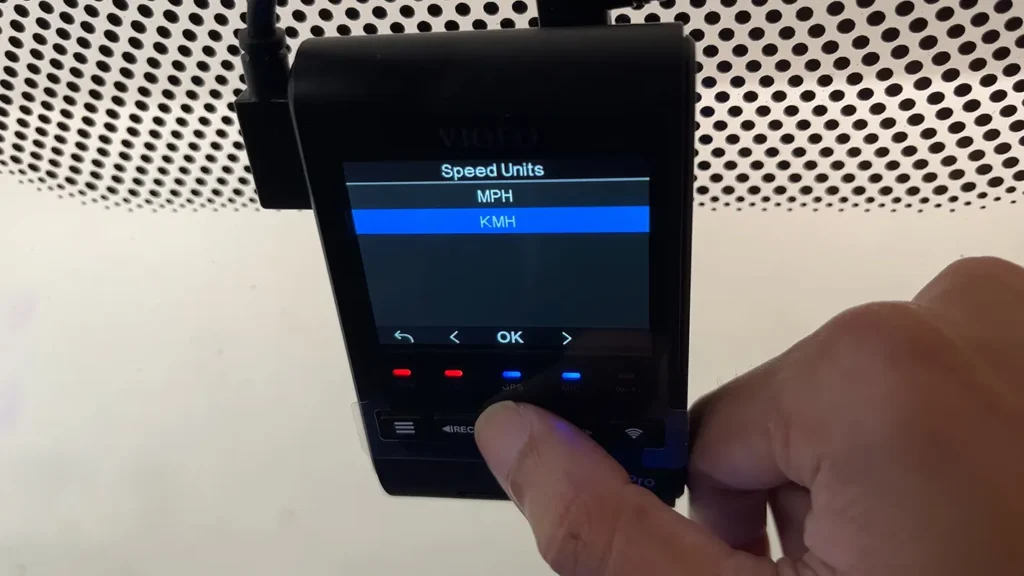
On the first boot, you will be prompted to set up the language, time zone, and speed units.
The dash cam will also prompt you to format the micro SD card. Press OK and the formatting will begin.
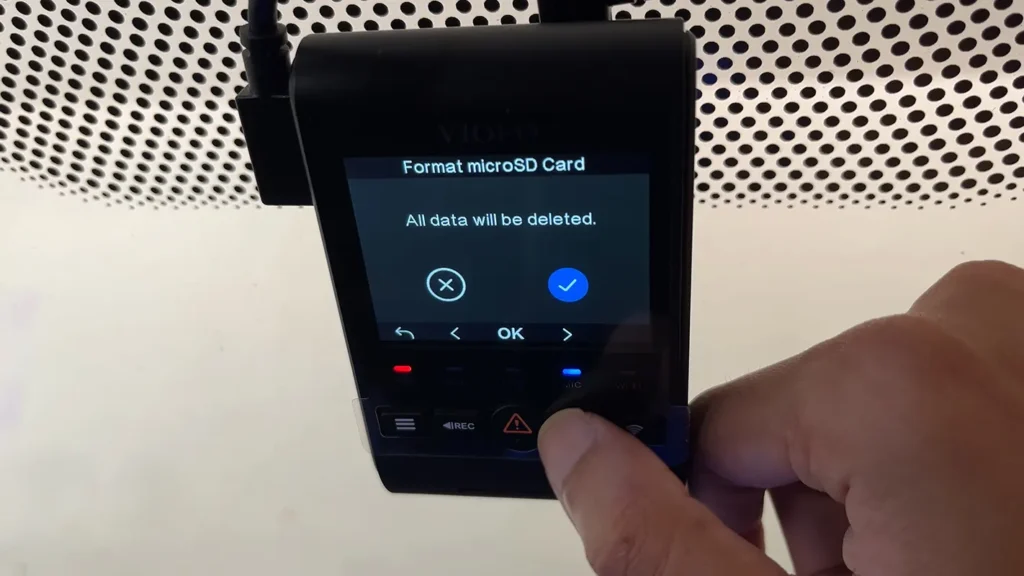
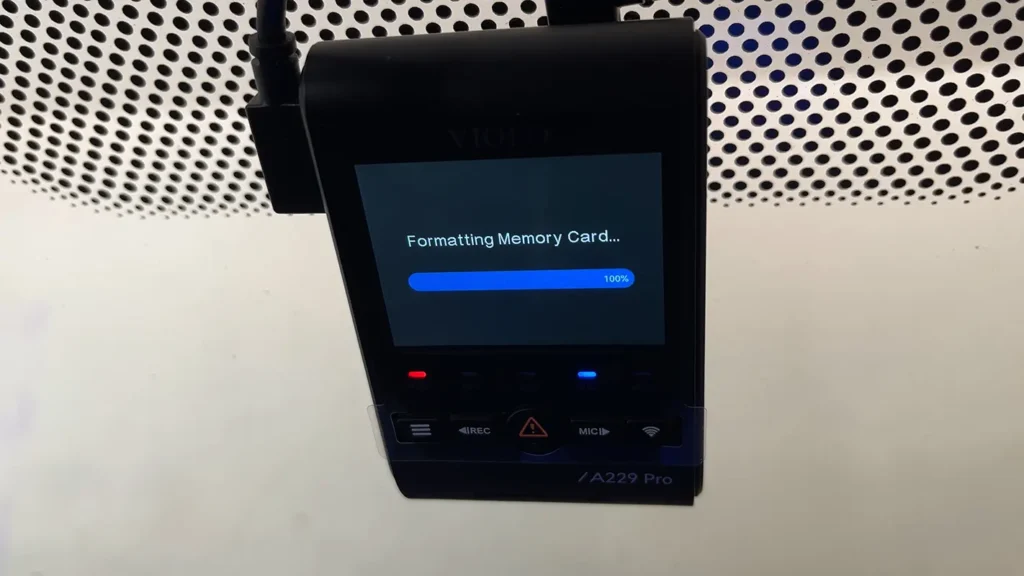
Once you press OK, the format will begin and should be completed in a few seconds.
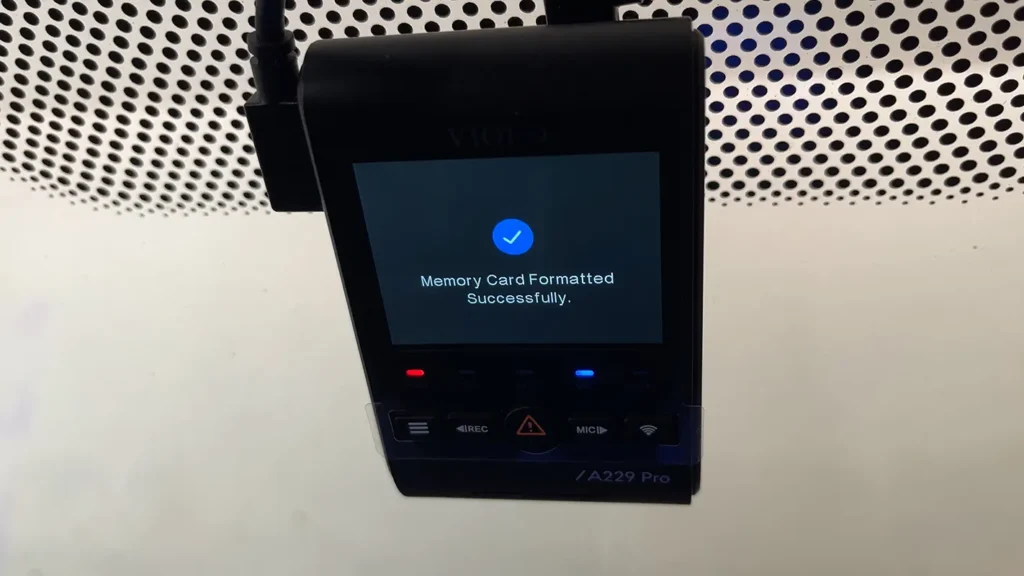
On completing the formatting a message will display Memory Card Formatted Successfully.
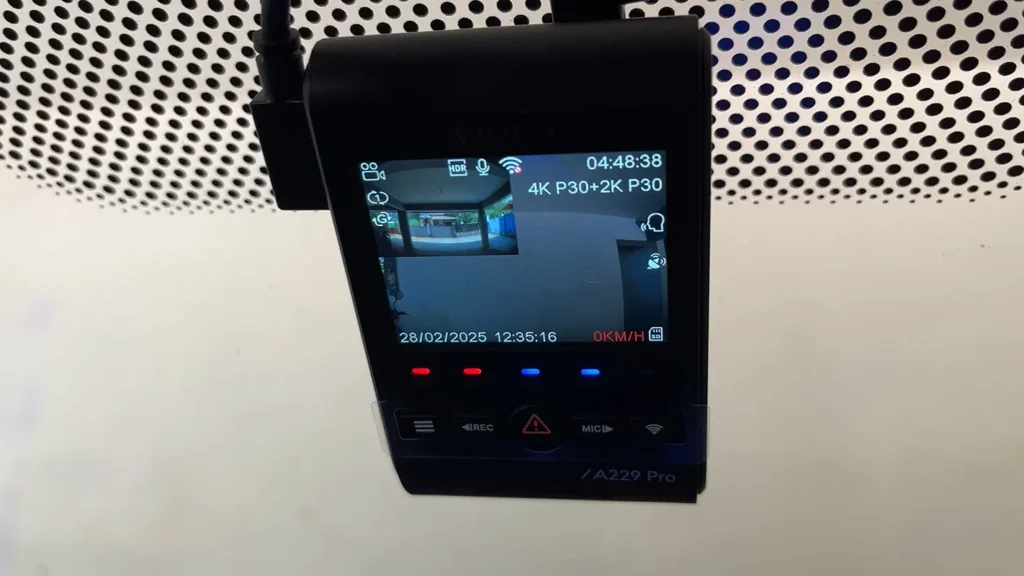
Your camera is now ready to capture.
That’s it! This is how you can perform a VIOFO firmware update.
Leave a Reply