Have you ever been typing a message on your iPhone, moved your finger toward the right side of the text box and accidentally activated the microphone or audio control?
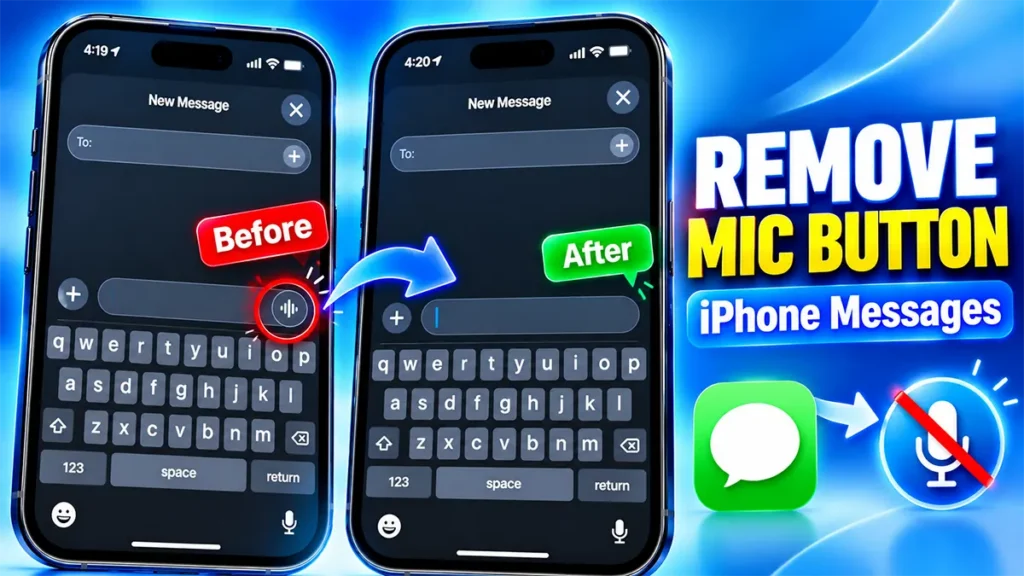
It can be surprisingly annoying. Instead of continuing to type, your iPhone may start an audio recording or activate Dictation. If you rarely send voice messages, that button can feel like it is simply taking up space and waiting for an accidental tap.
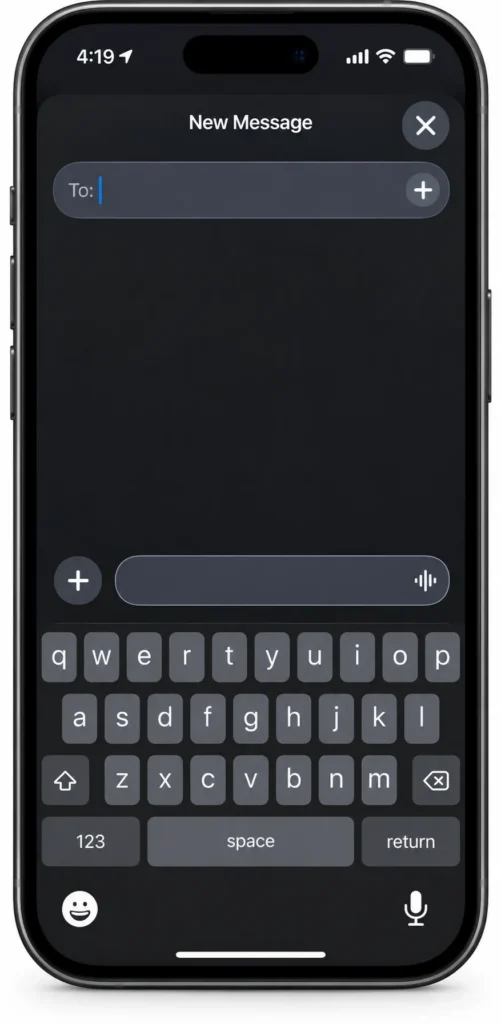
The good news is that iPhone users can now choose what appears in this area of the Messages app.
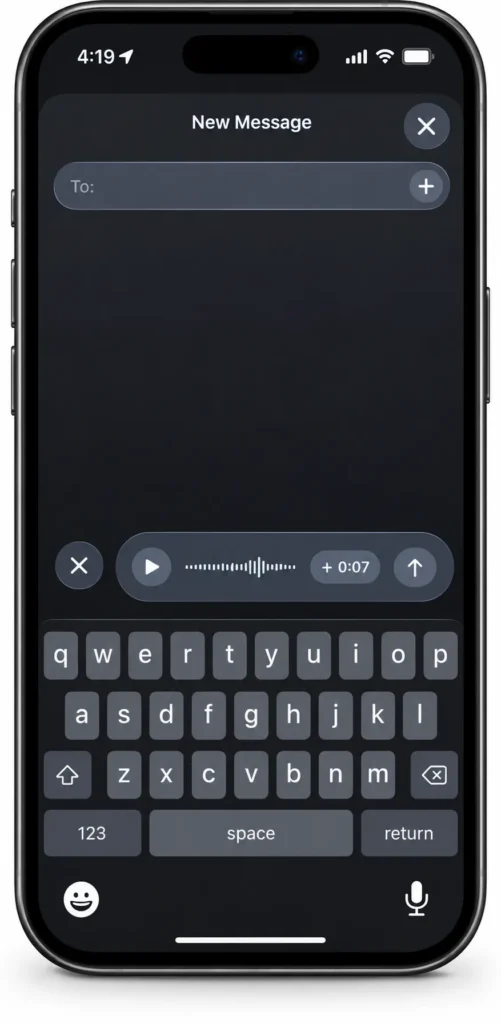
On iOS 27, Apple added a Show in Text Field setting that lets you choose between Record Audio, Start Dictation, or None. Selecting None removes the shortcut from the Messages text field.
Here’s how to change it.
Watch the video: How to Remove the Microphone Button from Messages on iPhone
Table of Contents
How to remove the microphone button from iPhone Messages
The setting is not inside the Messages app itself. You need to change it through the iPhone’s Settings app.
Follow these steps:
Start by opening the Settings app on your iPhone.
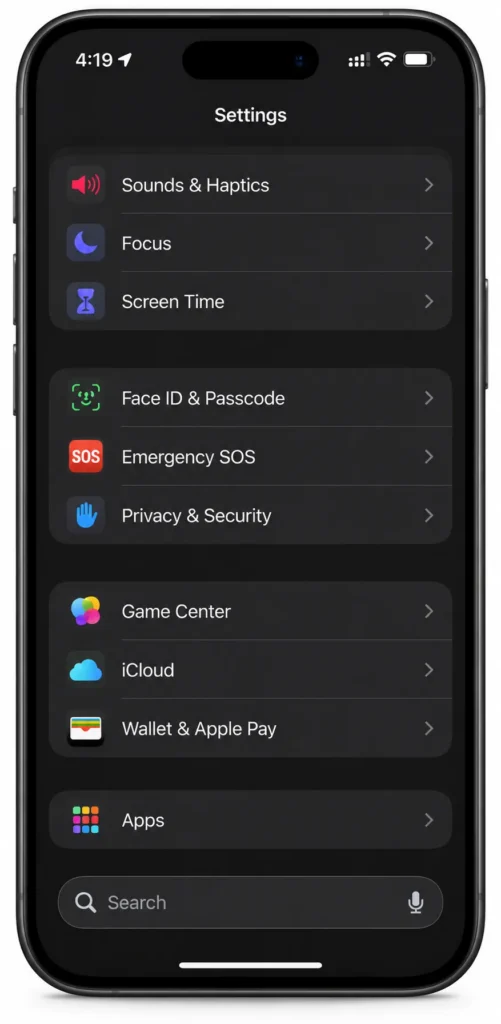
Scroll down through Settings and tap Apps.
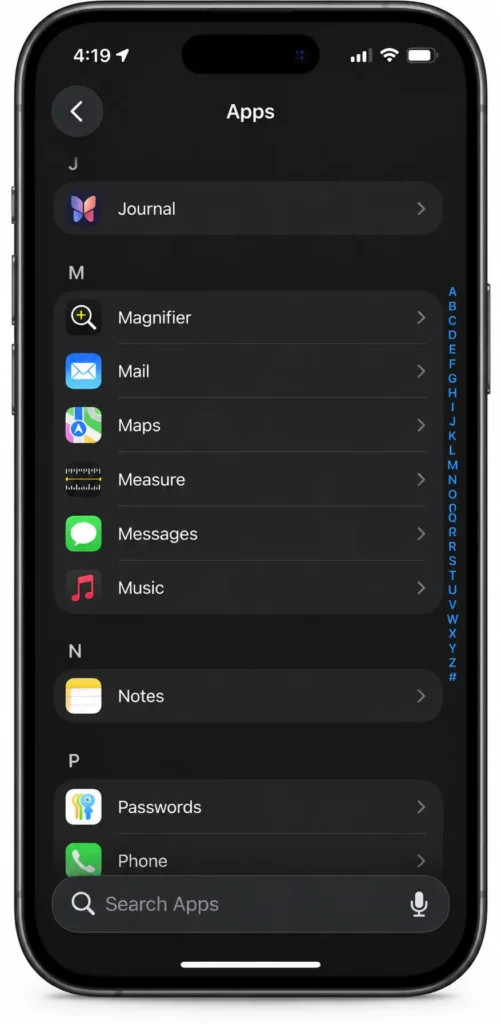
Inside the Apps section, find Messages and tap it.
This opens the settings specifically related to Apple’s Messages app.
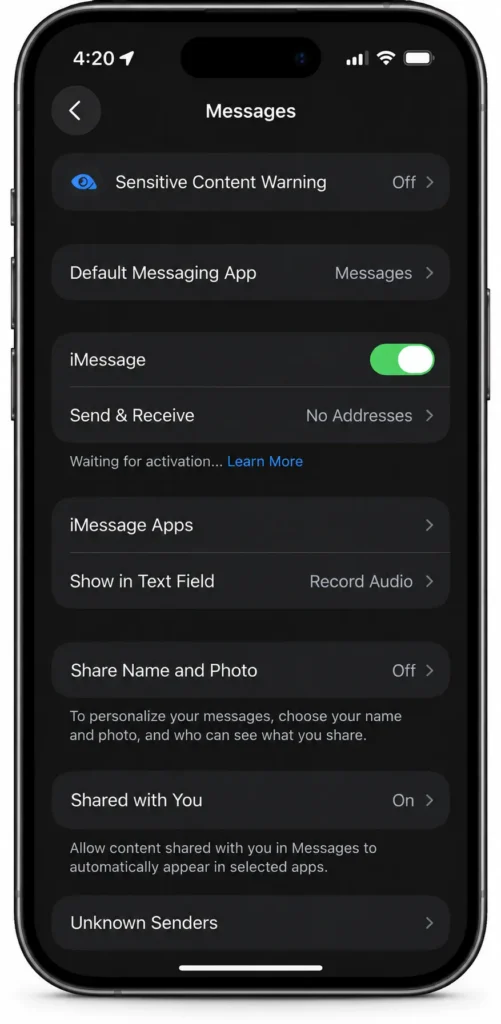
Scroll through the Messages settings until you find Show in Text Field.
Tap this option.
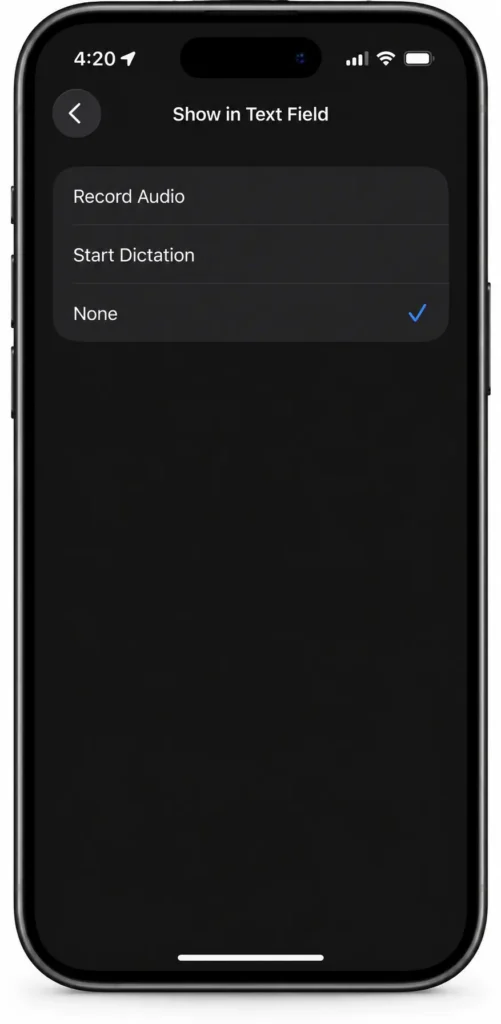
You should see three choices:
- Record Audio
- Start Dictation
- None
These options control what appears in the text-entry area of Messages.
If your main goal is to remove the microphone/audio shortcut completely, choose None.
Once selected, the extra button should disappear from the Messages text field.
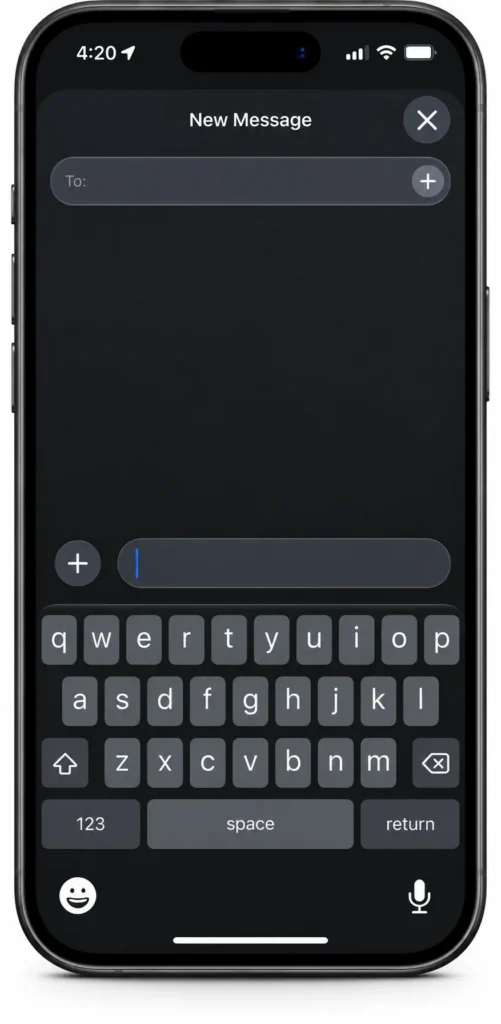
You can now return to Messages and open a conversation to check the change.
The typing area should look cleaner, with the unwanted shortcut removed.
What does “Show in Text Field” actually do?
This setting is worth understanding because choosing None does not mean that Apple has disabled every voice-related feature on your iPhone.
Instead, you’re deciding what shortcut appears directly in the Messages text field.
Record Audio
Choose Record Audio if you regularly send voice messages.
This keeps the audio-recording control available directly from the Messages text field.
Start Dictation
If you prefer speaking your messages and having your iPhone turn your speech into text, you can select Start Dictation instead.
This gives you quick access to Dictation from the Messages text field.
None
If you normally type your messages and don’t need either shortcut there, choose None.
This is the option to use if you’re trying to remove the microphone button from iPhone Messages and avoid accidental taps.
Does removing the button disable voice messages?
No. This is an important distinction.
Selecting None removes the shortcut from the text field, but it doesn’t remove the ability to send an audio message.
Apple’s current Messages instructions show that you can tap the Add (+) button beside the text field and choose Audio when you want to send an audio message.
So you can think of it this way:
Don’t use voice messages often?
→ Select None
Send voice messages frequently?
→ Keep Record Audio
Prefer speaking instead of typing?
→ Choose Start Dictation
That makes the setting much more useful than simply turning off a feature.
How to send an audio message after removing the button
Suppose you’ve selected None, but later you actually want to send a voice message.
You don’t need to change the setting again.
Open the conversation in Messages and tap the + button beside the text field.
From the options that appear, choose Audio.
You can then record your message and send it.
Apple also documents the Add button as the place where users can access audio messages and other Messages features.
This means removing the shortcut is more about cleaning up the Messages interface than removing the underlying audio-message feature.
Can I still use Dictation after removing the microphone button?
Yes. This is another useful point that can easily be misunderstood.
The Dictation button on the iPhone keyboard is separate from the Messages text-field setting.
If Dictation is enabled, you can tap the Dictation button on the onscreen keyboard and speak your message. Apple confirms that Dictation can be used anywhere you can type on iPhone.
So selecting None in Messages doesn’t mean you have to go back to typing everything manually.
You can still use keyboard Dictation when you actually need it.
How to use Dictation on iPhone
If you want to dictate a text message:
- Open Messages.
- Open a conversation.
- Tap inside the text field.
- Look for the Dictation button on the keyboard.
- Tap it.
- Start speaking.
- Tap the Dictation button again when you’re finished.
Apple says Dictation can be enabled from:
Settings → General → Keyboard → Enable Dictation
If the Dictation button isn’t appearing on your keyboard, check this setting.
This is useful because you can remove the shortcut from the Messages text field while keeping Dictation available when you genuinely want to use it.
Why you might want to remove the microphone button
For people who rarely send audio messages, the shortcut isn’t necessarily useful.
The problem becomes more noticeable when you’re typing quickly and your finger accidentally lands on the control.
Removing it can make the Messages interface feel simpler and reduce those accidental activations.
It’s particularly useful if you:
- Mostly send normal text messages
- Rarely send voice messages
- Accidentally activate audio recording
- Don’t use Dictation from the Messages text field
- Prefer using Dictation from the keyboard
- Want a cleaner Messages typing area
The important thing is that you aren’t permanently giving up the features. You’re simply choosing where you want to access them.
Record Audio vs Start Dictation vs None
Here’s a quick way to decide which option is right for you:
| Option | Best for |
|---|---|
| Record Audio | People who frequently send voice messages |
| Start Dictation | People who prefer speaking their messages as text |
| None | People who mainly type and want the shortcut removed |
If your only goal is to get rid of the microphone/audio button in Messages, select None.
What if the button is still showing?
After changing the setting, return to the Messages app and check the text field.
If the previous control doesn’t immediately appear to have changed, close and reopen Messages.
Then open a conversation and check the message-entry area again.
Also make sure you’re looking at the Messages text field, rather than the separate Dictation microphone on the iPhone keyboard.
Those are two different controls.
Don’t confuse the Messages button with keyboard Dictation
This is probably the most important thing to understand.
There can be more than one microphone-related control on an iPhone.
The setting discussed in this article controls the shortcut associated with the Messages text field.
The microphone used for keyboard Dictation is different.
Apple’s documentation specifically describes Dictation as a keyboard feature that can be used wherever you can type.
So if you select None and still see a microphone on the keyboard, that is expected.
It doesn’t mean the Messages setting failed.
How to bring the button back
Changed your mind later?
No problem.
Go back to:
Settings → Apps → Messages → Show in Text Field
Then choose either:
Record Audio
or
Start Dictation
depending on which shortcut you prefer.
The setting can therefore be changed whenever your messaging habits change.
Is this the same as turning off Dictation?
No. This is an important difference.
Choosing None under Show in Text Field changes the shortcut shown in Messages.
It doesn’t turn off the iPhone’s system-wide Dictation feature.
If you actually want to disable Dictation throughout the iPhone, Apple provides a separate setting under:
Settings → General → Keyboard → Enable Dictation
Turning that off affects Dictation itself, whereas choosing None in Messages simply removes the Messages text-field shortcut.
This is one of those small iPhone settings that is easy to overlook but useful once you know it exists.
If you mostly type messages and keep accidentally activating the audio or microphone shortcut, you don’t have to live with it.
The best part is that Apple hasn’t taken away the underlying features. Audio messages are still available through the + button, while Dictation remains available through the iPhone keyboard.
So instead of disabling features you might occasionally need, you can simply remove the shortcut you don’t use.
If you frequently find yourself accidentally starting a voice message while trying to type, this is a setting worth changing.

Leave a Reply