• Home
  • About
  • Contact Us
  • Privacy Policy

Reveal That

Powered by Technology & Internet

  • Android
  • WordPress
  • Internet
  • Software
  • Windows
  • SEO Tutorial
  • Make Money Online
  • Tools
    • Case Converter Upper Lower Title Sentence Caps
    • HEIC to JPEG
    • Car Android Boot Logo Generator
    • Viofo Dashcam Video Combiner
    • Viofo Dashcam Organizer

Purge All Caches Generates “Failed to Purge: Cloudflare Cache: Authentication Error”

Written by:
Vjay
Published on:
July 18, 2025
Thoughts:
No comments yet

If you are using the Total Cache Plugin integrated with Cloudflare, and while purging all caches you encounter the error: “Failed to purge: Cloudflare cache: Authentication error”

Failed to Purge: Cloudflare Cache: Authentication Error

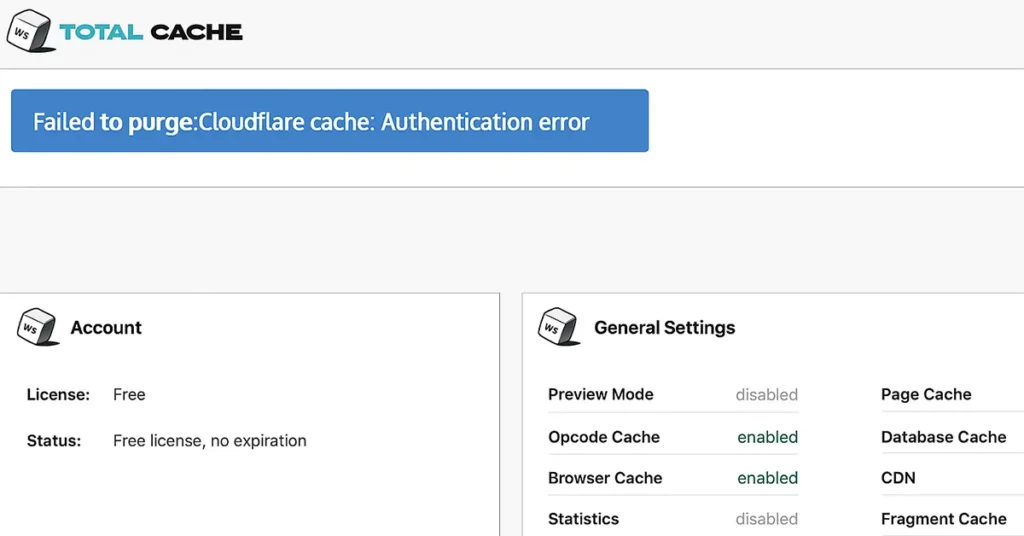
It means there is a misconfiguration in your setup. When such an error appears, it should be rectified immediately. However, you may have already tried all available options without success. If you are stuck in this situation, the solution below will 100% fix the issue.
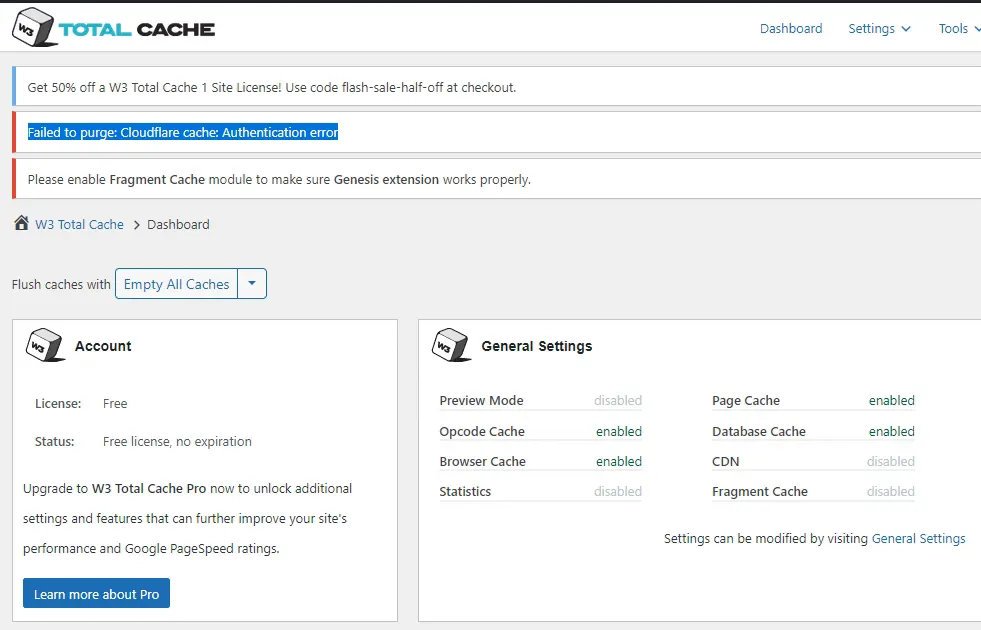
Failed to purge: Cloudflare cache: Authentication error

Table of Contents

  • Why Does the “Failed to purge: Cloudflare cache: Authentication error” Appear?
  • What Happens When This Error Appears?
  • How to Fix “Failed to purge: Cloudflare cache: Authentication error”

Why Does the “Failed to purge: Cloudflare cache: Authentication error” Appear?

This error may appear due to the following reasons:

  • You have recently changed your domain name.
  • There may be bugs or issues in the plugin integration.

What Happens When This Error Appears?

When this error occurs during cache purging:

  • Your website may become unresponsive temporarily.
  • This can negatively affect user engagement and site performance.

How to Fix “Failed to purge: Cloudflare cache: Authentication error”

In your WordPress dashboard, click on Performance in the left-hand menu (if you have the Total Cache Plugin installed).

This will take you to the Total Cache Dashboard.

Total Cache Dashboard

In the left pane, under expanded Total Cache Plugin options, Click on Extensions.

Total Cache Extensions

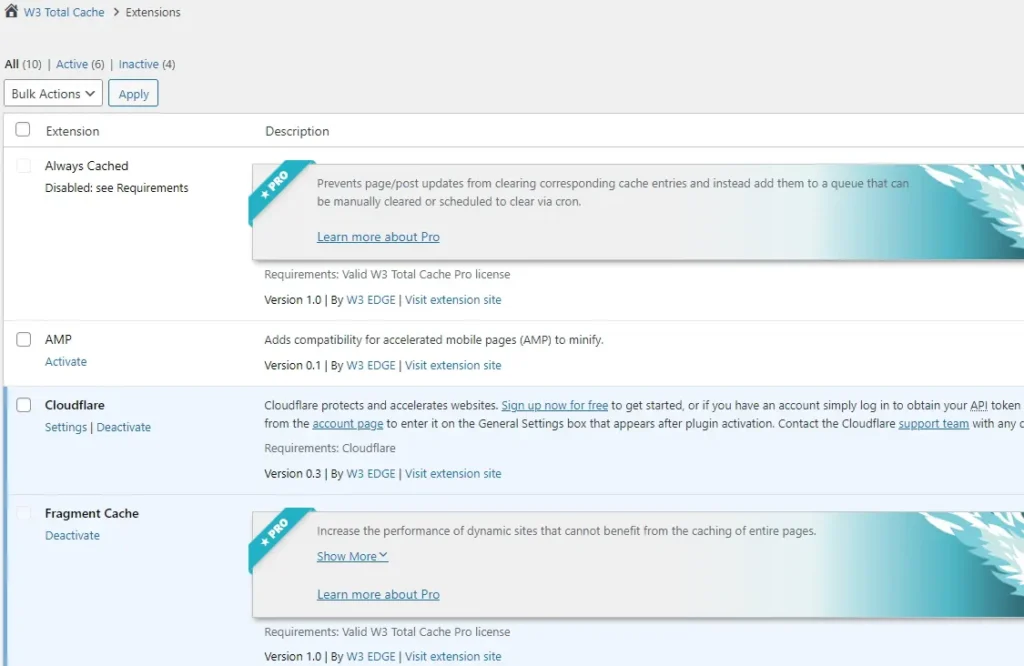
On the Extensions page, locate Cloudflare and click on Settings.

Cloudflare Settings

Click on the Reauthorize button.

Cloudflare Reauthorize

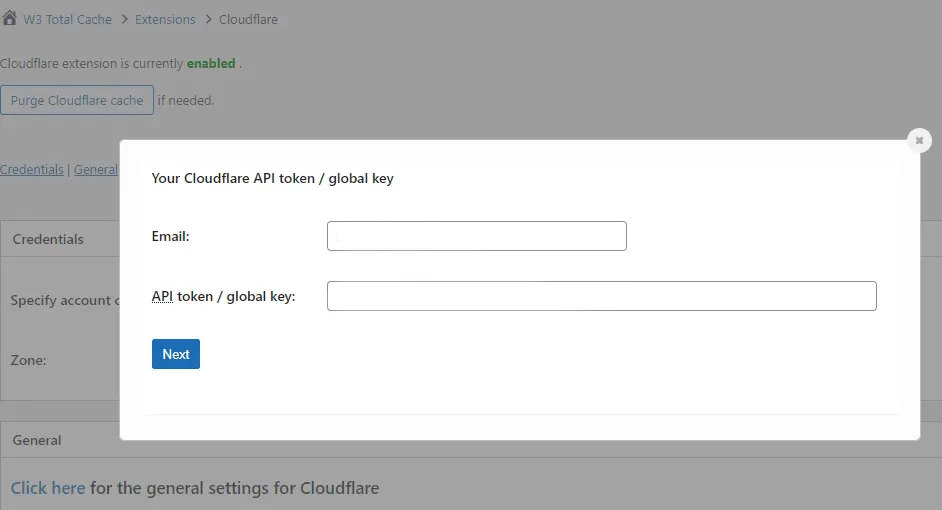
Your previously configured Cloudflare email and API key will be displayed.

Cloudflare Select Zone

Click on the Next button.

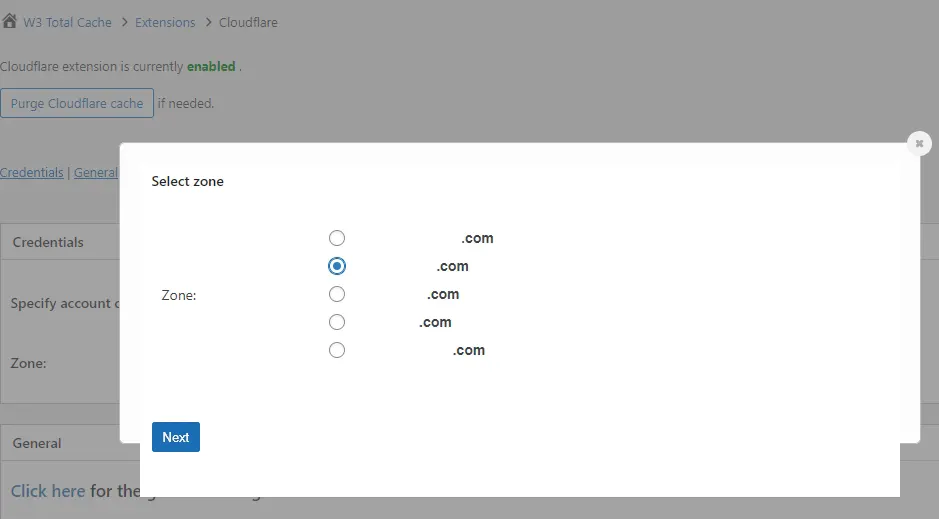
From the list, select the zone (your website domain) and click Next.

The page will refresh.

Now, try purging the cache again. You should no longer see the authentication error.

Join us on Telegram

Categories: Wordpress

About Vjay

Vjay is the admin of the blog RevealThat.com who loves to share various topics regarding Tech and other Internet Related Stuff. If you like to connect with visit our Contact us Page

Leave a Reply Cancel reply

Your email address will not be published. Required fields are marked *

10 + 18 =

RECENT POSTS

Spelling Bee Answers – New York Times Game

Letter Boxed Answers Today

NYT Sudoku Answers Today – New York Times

NYT Connections Answers for Today

Wordle Today Answer – Wordle For Today Hint Revealed Here

How to Fix We Couldn’t Open Your Teams app

Flipkart Big Billion Days 2025 – iPhone 15 at 48K Best Deals

Amazon Quiz Answers – FunZone

FASTag ₹3000 Yearly Subscription | How to Apply, Eligibility, Limits

My Notes Disappeared on My iPhone: How to Bring It Back

© 2025 · RevealThat.com · Sitemap · All trademarks & logos belongs to their respective owners

Jai Mata Di

ॐ ऐं ह्रीं क्लीं चामुण्डायै विच्चे|