HEIC is a unique image file format introduced by Apple in its devices. These HEIC files generally work smoothly within the Apple ecosystem, but when it comes to sharing them on other devices like Android, Windows, or online platforms, it can become troublesome.
If you have ever tried sharing a HEIC file with a Windows or Android device, you may have noticed that, by default, these file formats are often unrecognized. Even on Windows, installing plugins to make HEIC files compatible may not provide a seamless experience. You might experience very slow image loading, and if you have multiple HEIC images in a folder, generating thumbnails can take a significant amount of time.
Table of Contents
What Is HEIC
Apple’s HEIC format stands for High Efficiency Image Container, which allows images to be captured and stored in a smaller file size without compromising quality, compared to the JPEG format. This helps in maintaining high-quality pictures while also saving storage space.
Why to Change HEIC to JPG Format
Right now, the demand for converting HEIC files is increasing because HEIC is not widely supported across all platforms. If you need to use HEIC images elsewhere, you will have to convert them to a more universally supported format—JPEG. Whether you want to share a HEIC file on an Android device or Windows, or even edit it using most common photo editing software, converting it to a compatible format is essential.
In this guide, we will introduce you to various methods to convert HEIC to JPG without relying on third-party online tools, and we’ll show you how to do it on almost any device.
Convert HEIC to JPG on iPhone
Are iPhone photos in HEIC format bothering you? Want to convert the files on your iPhone itself without using any sketchy websites or compromising your privacy? Here, I have explained an official way to convert HEIC to JPG on an iPhone without installing any additional apps or visiting online tool websites that allow HEIC to JPG conversion.
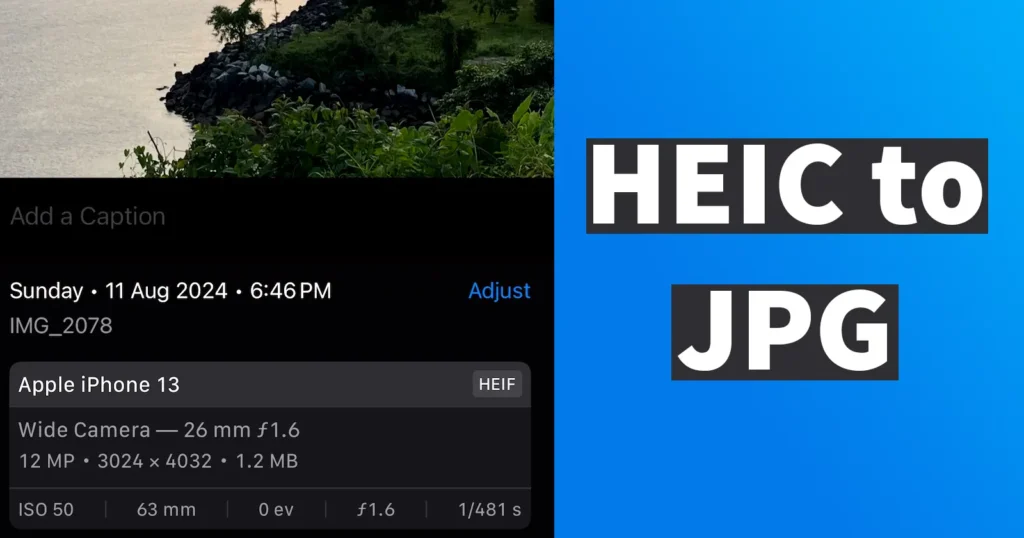
To verify the file format in your iPhone gallery, open the Photos app and select any image. Tap on the “i” button to view the file information. There, just beside the phone model, you will see HEIF, which indicates that the image is in the High Efficiency Image File Format (HEIC).
The functionality to convert iPhone photos to JPG is already present on your device and can be achieved by following the proper instructions.
To convert HEIC to JPEG on an iPhone, open the Photos app.
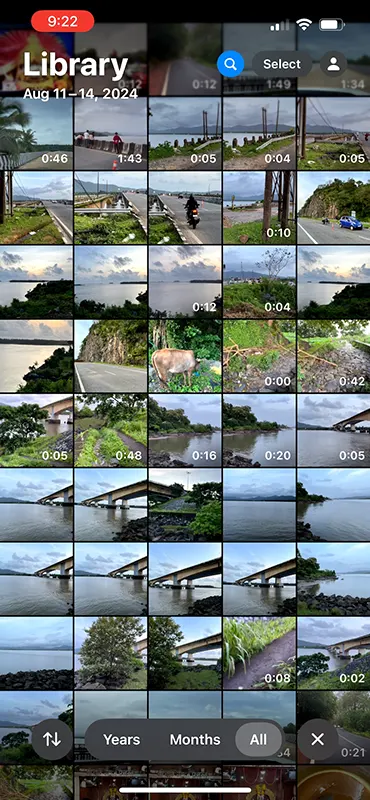
Select the HEIC photos from your library by tapping the Select option at the top right corner.

You can select multiple HEIC images to convert them to JPEG or select a single image by tapping on it.
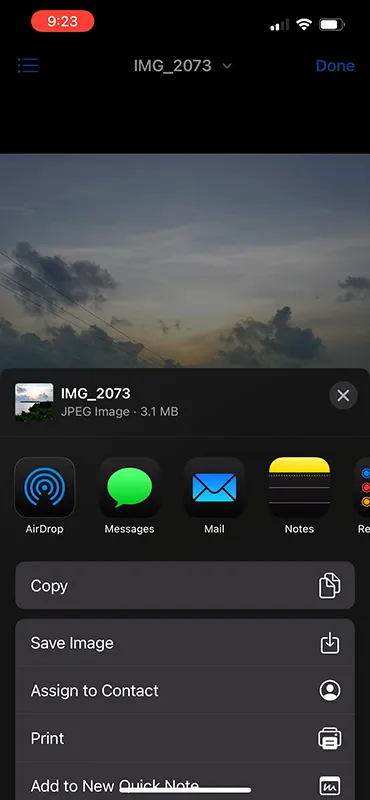
Once you have selected the HEIC image files, tap on the Share icon, which appears as a square with an up arrow.
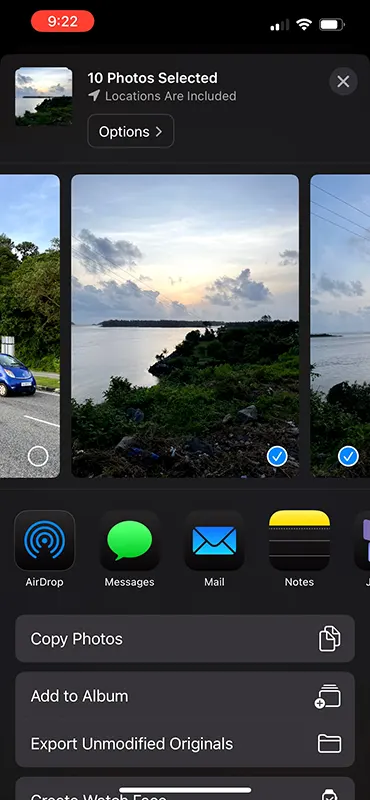
From the options presented, tap on Copy Photos.
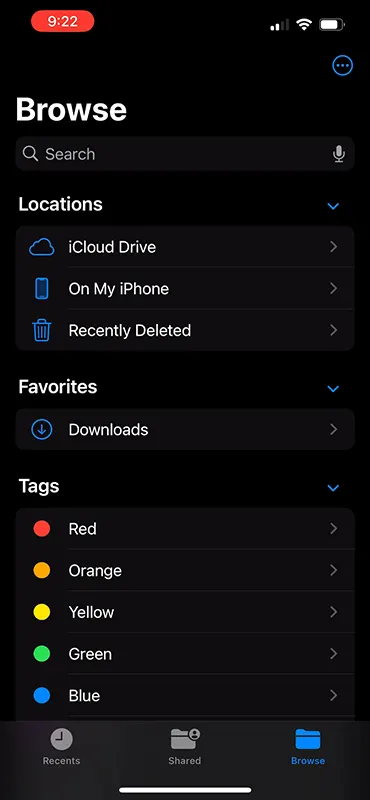
Now, open the Files app and tap on the Browse tab.
Under Locations, tap on On My iPhone.
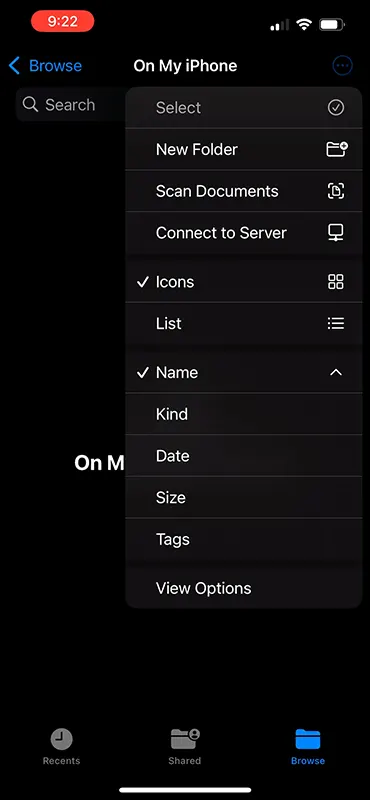
Tap on the three dots at the upper right corner and select New Folder.
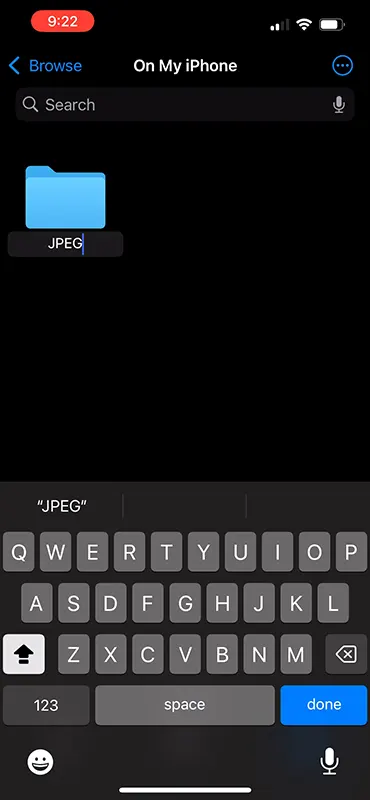
Create a new folder named JPEG.
Open the newly created folder.
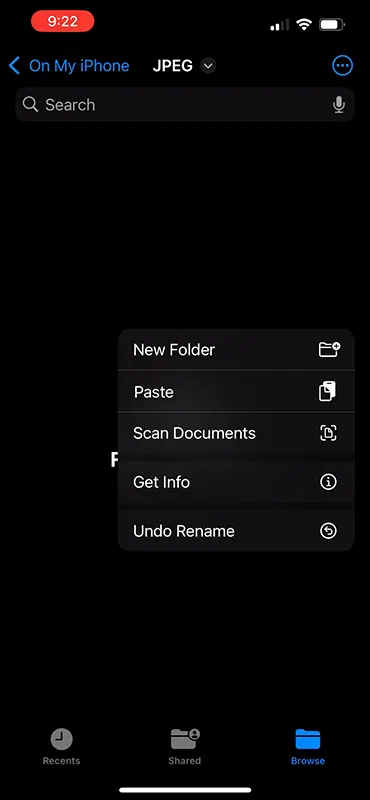
Long-press on the blank area within the folder, and from the options presented, tap on the Paste button.
All the selected files will be copied into this JPEG folder.
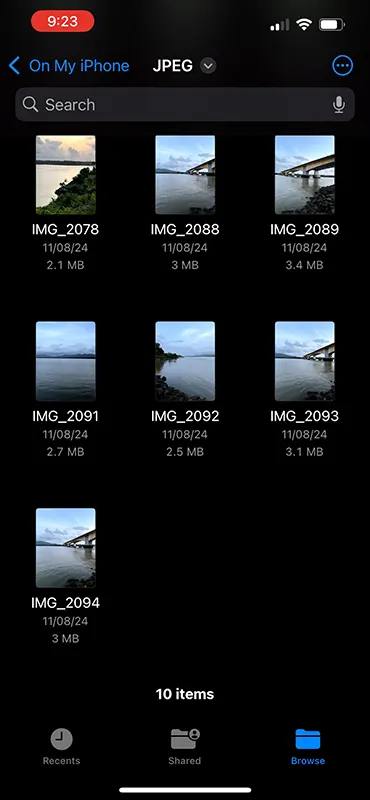
The HEIC files you selected have now been converted into the JPEG file format.
To confirm the file format of the images copied to the JPEG folder:
Open a file, tap on the Share button, and just after the image file name, you will see the format stated as JPEG Image.
This is how you can easily convert HEIC files on your iPhone into JPEG format without using any third-party tools or websites.
If you want to move these converted JPEG files into your Photos library:
Tap on the three dots icon at the top right corner and select Select.
Tap on the images to select them. You can either select multiple images or tap Select All.
Once selected, tap on the Share button and then tap Save Image.
This will add the converted JPEG images to your Photos app library.
This is how you can change heic to jpg on iPhone.
Convert HEIC to JPG on Mac
To change HEIC to JPG on a Mac, open the HEIC file using Preview.
The file will open in the Preview app.
In the Preview app, click on File in the menu bar and select Export from the drop-down options.
Choose the folder where you want to save the file.
Click on Options, select JPEG as the format, and set the Quality to Best to ensure high-quality conversion.
Click on the Choose button to start the export process.
The converted JPG file will be saved in the selected location.
Navigate to the folder where you saved the converted file, and you will see that the HEIC file has been successfully converted to JPG.
Batch Convert HEIC to JPG on Mac
If you need to convert multiple HEIC files to JPG format, the above method may be time-consuming. Instead, follow these steps to batch convert HEIC to JPG on Mac:
You will now see all your HEIC images successfully converted into JPEG format.
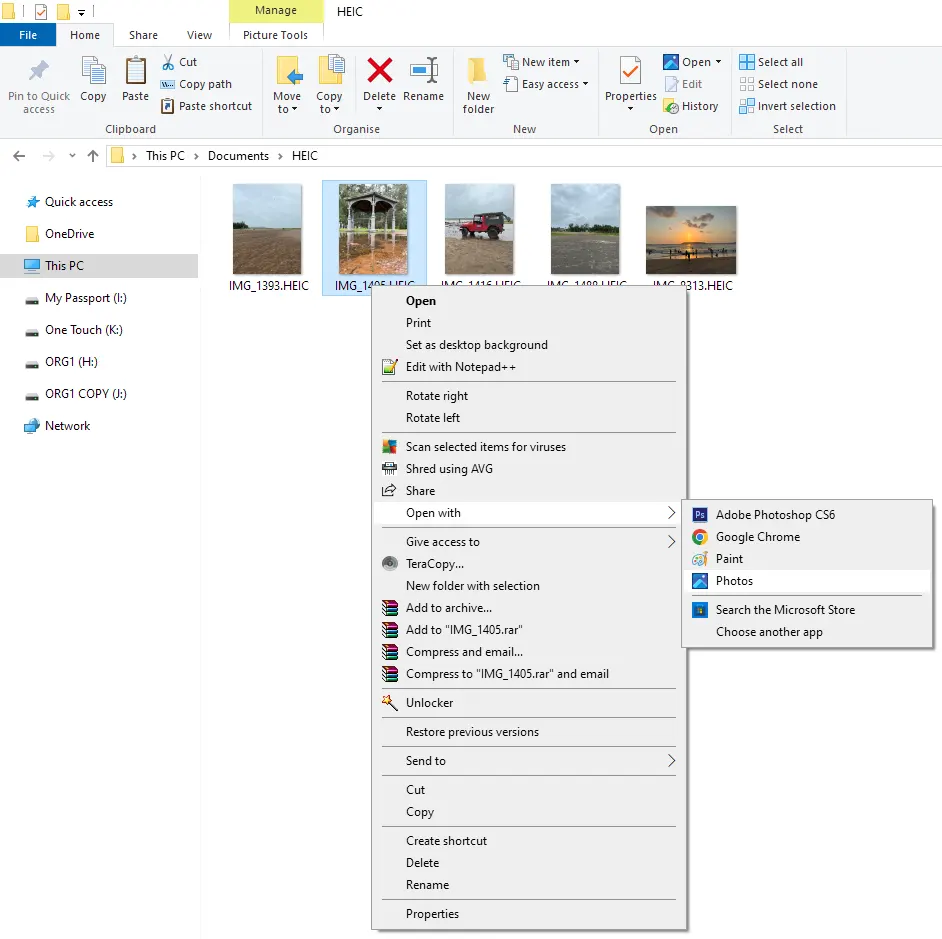
Select all the HEIC photos you want to convert.
Right-click, go to Open With, and select Preview.
All the selected HEIC photos will open in the Preview app.
On the left-hand side, you will see thumbnails of all the images.
Select all the thumbnails by clicking and dragging or using Command (⌘) + A.
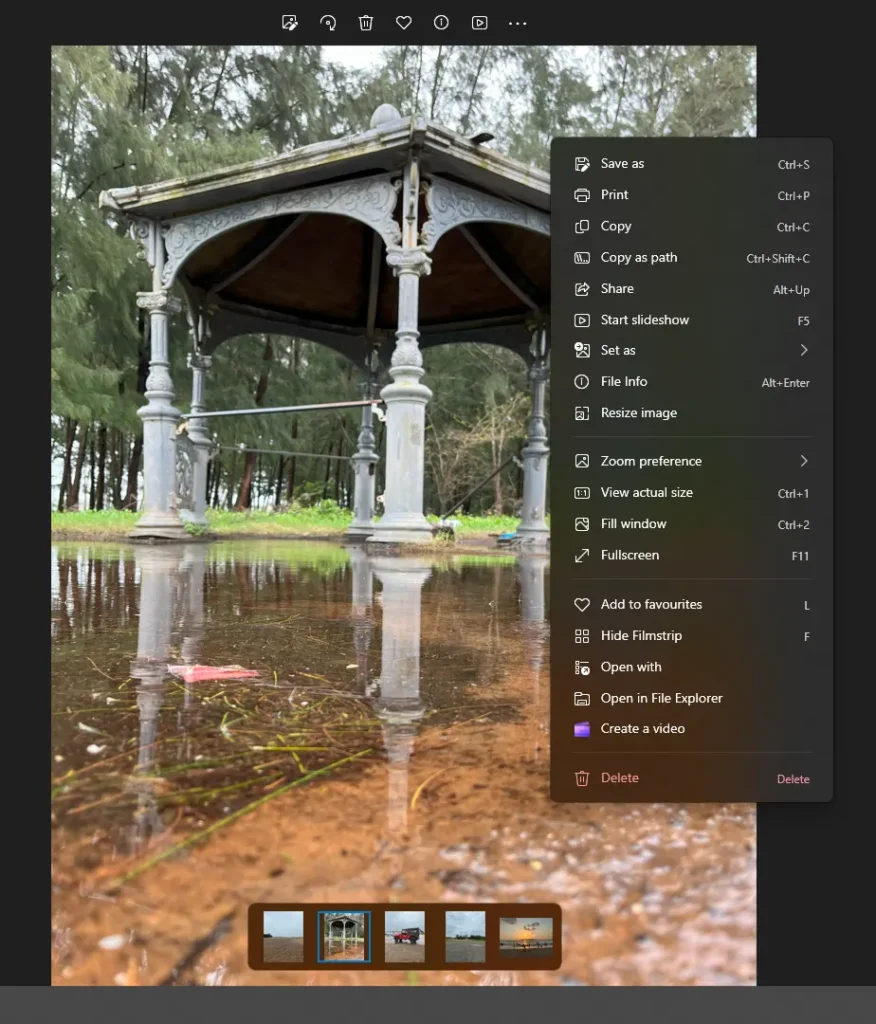
With all photos selected, go to File and click Export Selected Images.
Choose the location where you want to save the converted files.
Click on Options, select JPEG as the format, and set the Quality to Best for the highest quality conversion.
Click Choose to start the exporting process.
Depending on the number of images selected, the conversion may take some time.
Once completed, navigate to the folder where you saved the converted JPEG photos.
Convert HEIC to JPG in Windows
To convert HEIC to JPEG in Windows, follow these steps:
Open the HEIC photo using the Photos app.
Right-click on the opened image or click on the three dots in the top-right corner of the Photos app.
Select Save As.
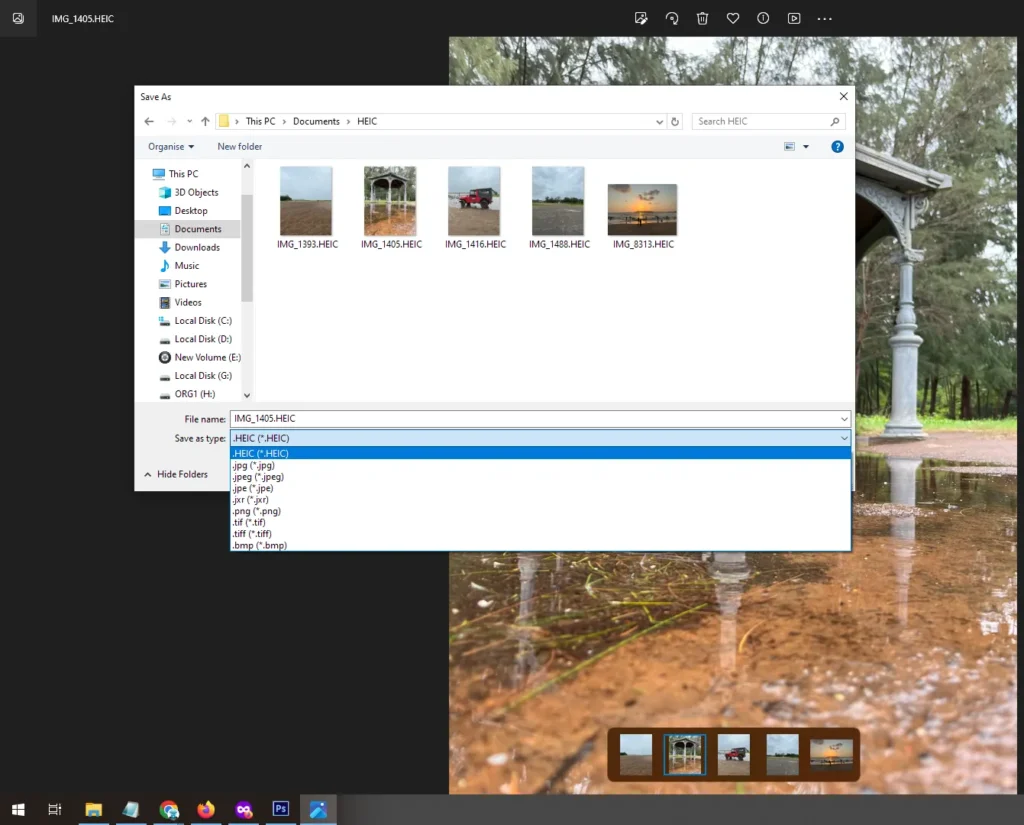
Choose the location where you want to save the photo.
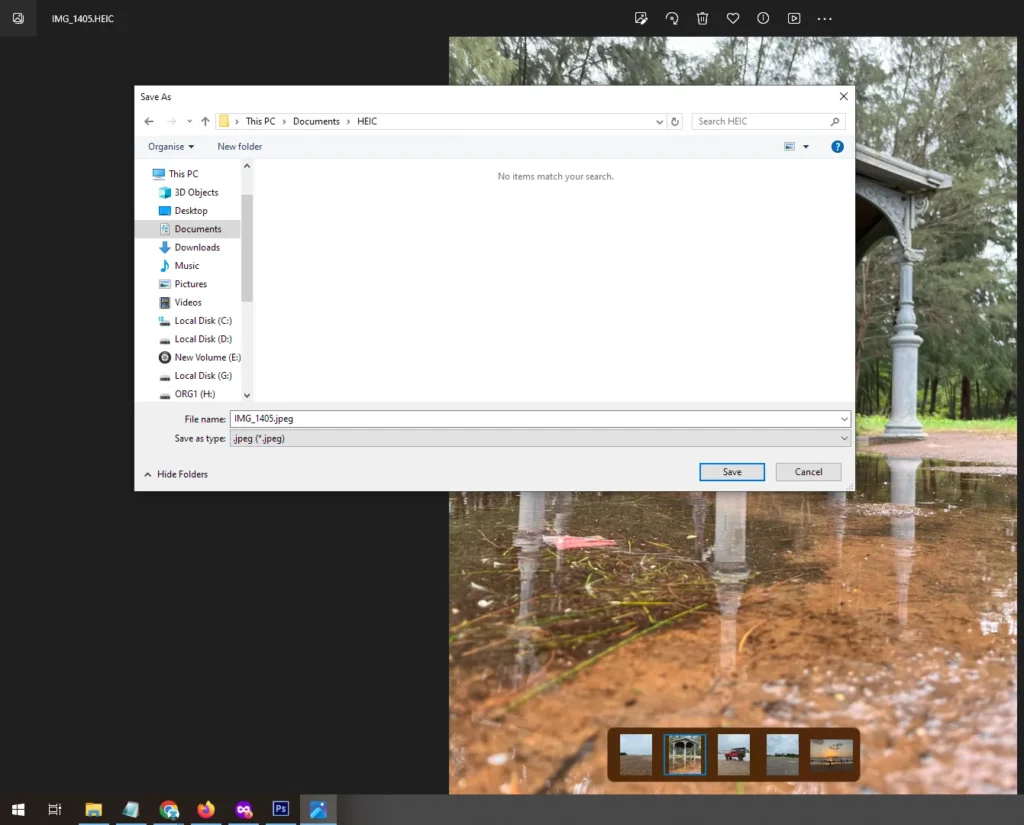
In the Save as type dropdown, select JPEG.
Click the Save button.
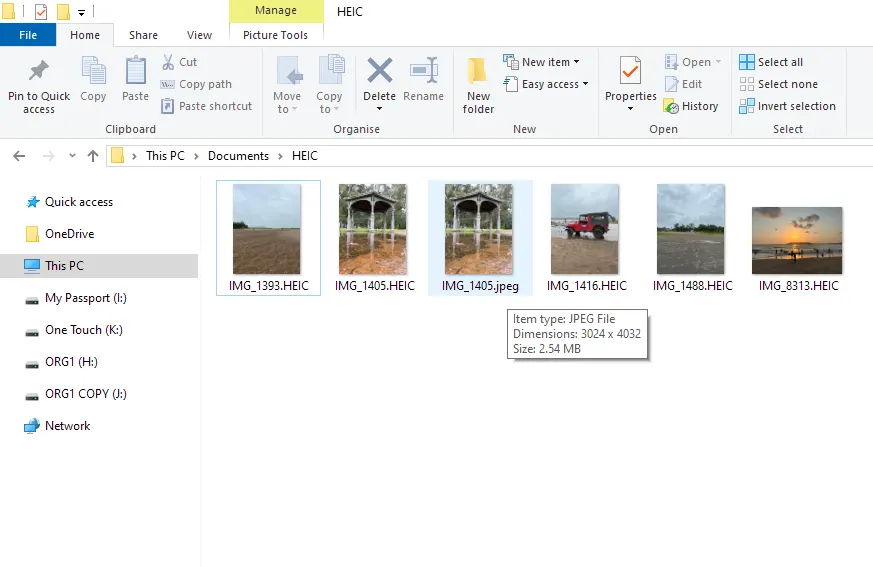
The HEIC file will now be converted and saved as a JPG on Windows.
Batch Convert HEIC to JPG
This process to convert HEIC to JPG works on both Mac, Windows operating systems as well as you can even use this to Open HEIC File in Android.
To convert multiple HEIC to JPG in one go, click on the Online HEIC to JPG Converter Tool
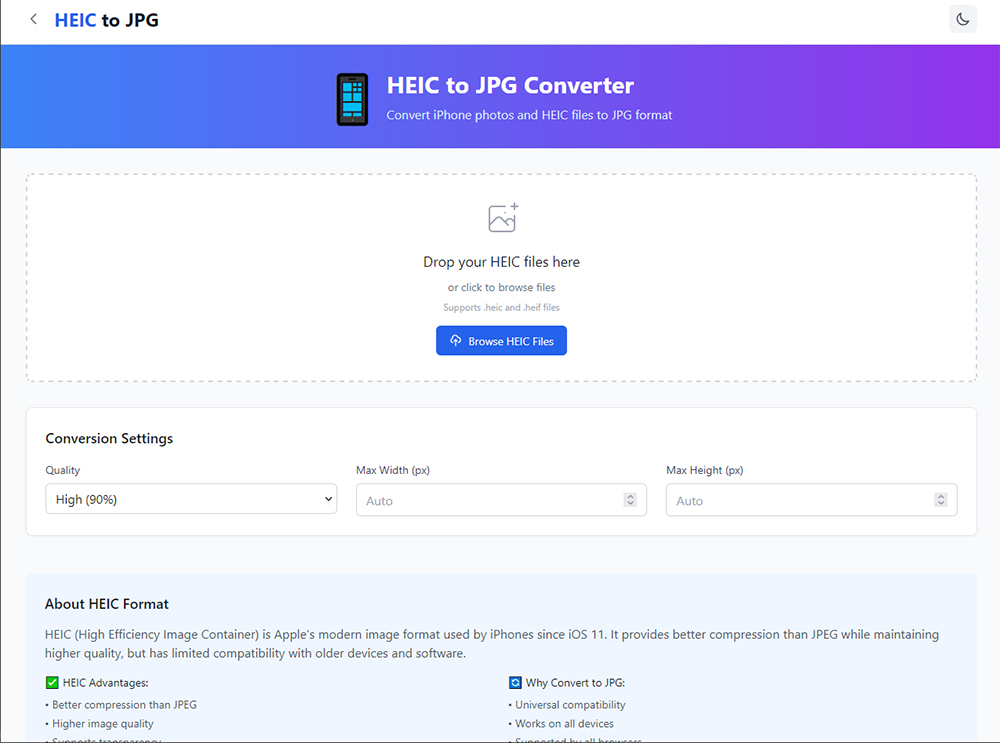
Once the HEIC to JPG Converter Online Tool opens, click on the Browse HEIC Files button and select all the HEIC files from your device that you wish to convert.
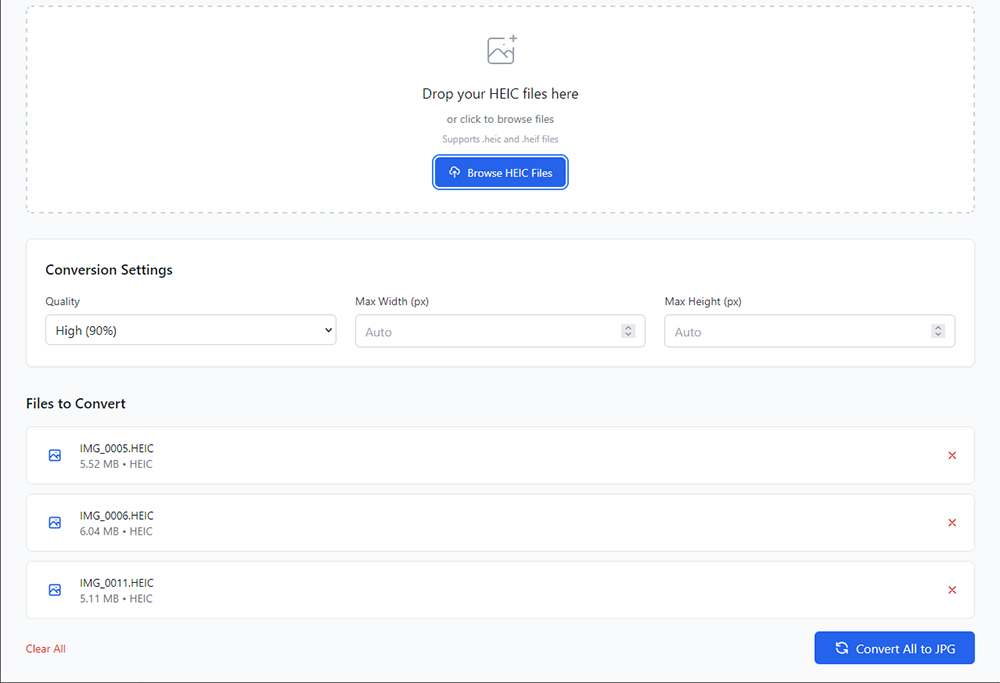
Under Conversion Settings, you may choose the highest quality option.
The files you selected will appear in the Files to Convert section.
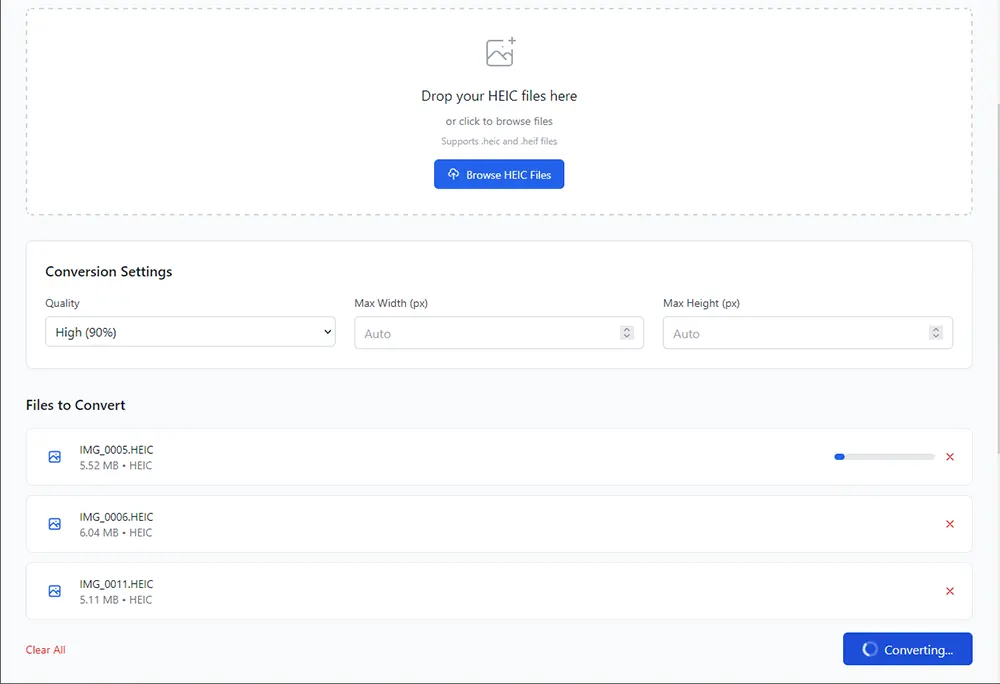
Click on the Convert All to JPG button.
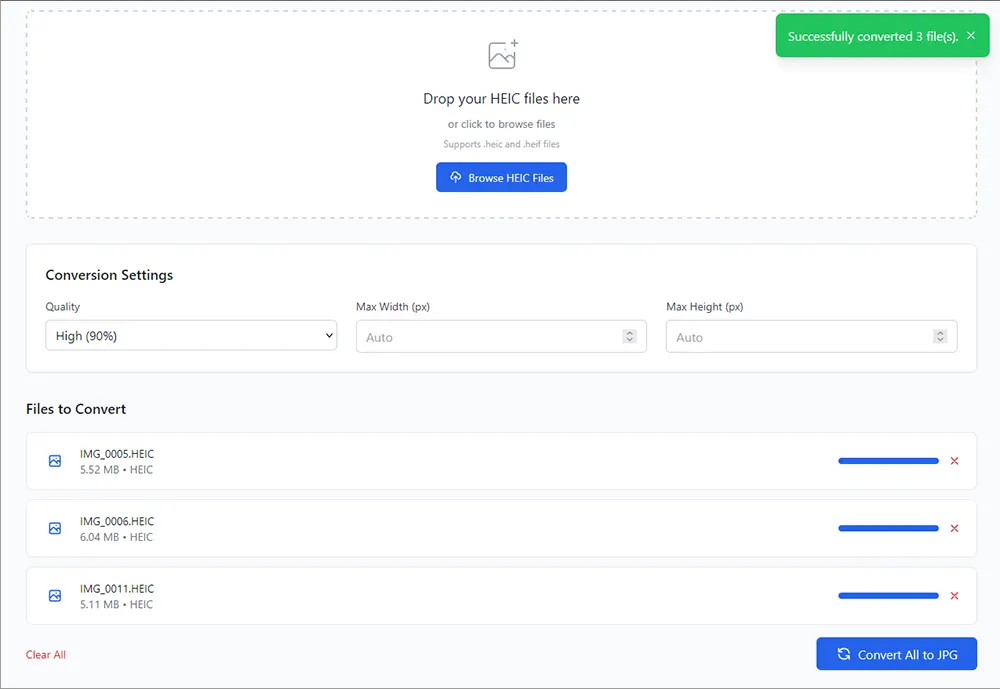
The conversion may take a few minutes to complete.
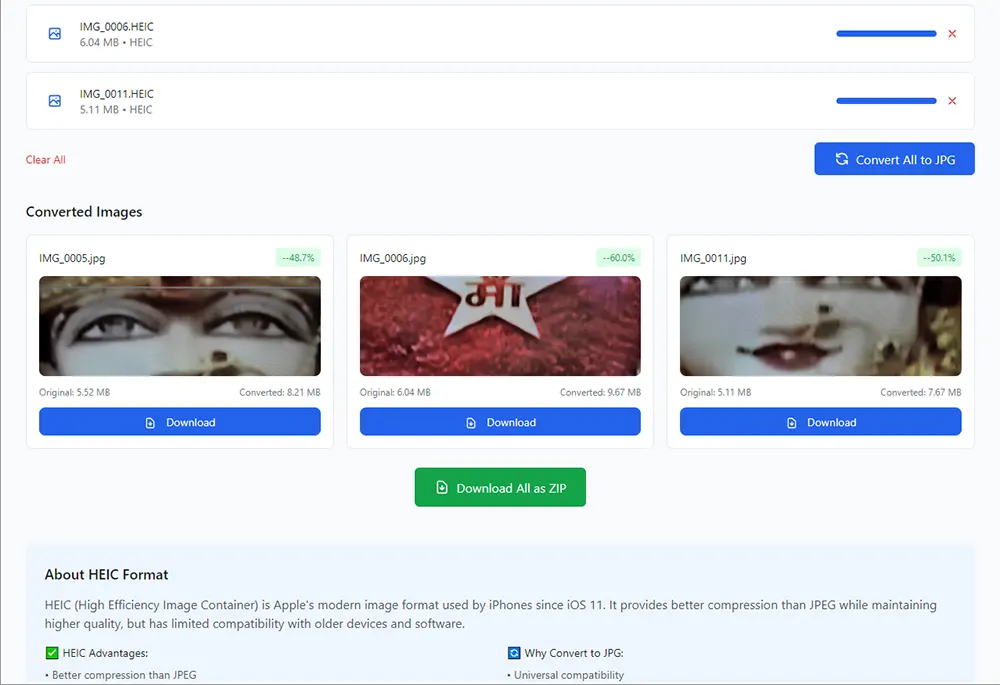
Once the conversion is done, all the converted image thumbnails will appear below.
You can click the Download button under each converted image to save them individually, or click Download All to download all the converted JPG images at once.
All your converted images will then be saved to your device.
How to take a JPEG Photo on iPhone
If you do not want to capture photos on your iPhone in HEIC or HEIF format, you can configure your device to save pictures in JPEG format instead. By setting your iPhone to capture images in JPG, you won’t have to worry about converting HEIC files to JPEG, which can be time-consuming. However, this change will only apply to new photos existing HEIC images will remain in the same format.
Open Settings
Scroll down and tap on Camera
Tap on Formats. If your camera is currently set to capture photos in HEIC, the High Efficiency option will be selected
Change the option to Most Compatible
Now, any new photos you capture will be stored in JPG (JPEG) format instead of HEIC.
Leave a Reply